Modern German Infantry Painting Tutorial
Willkommen zu unserem vierten Tutorial für Team Yankee, in welchem ich euch zeigen möchte wie man einen Panzergrenadier der Bundeswehr bemalt.
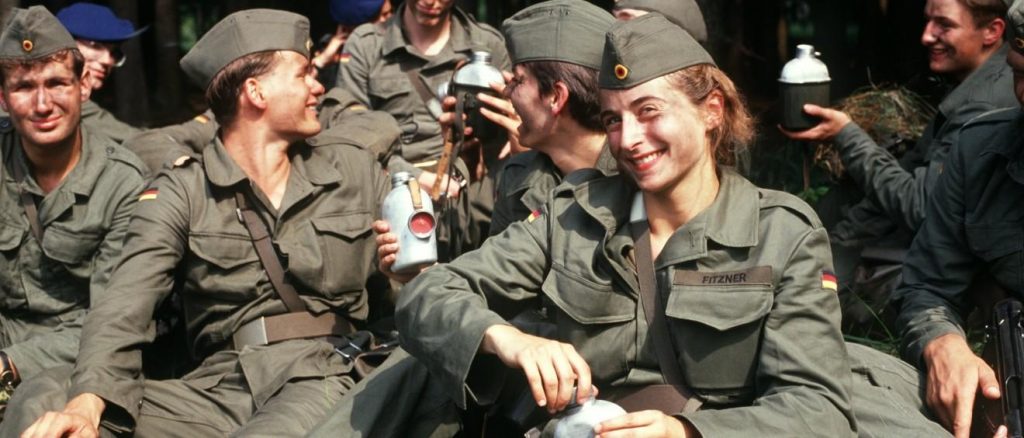
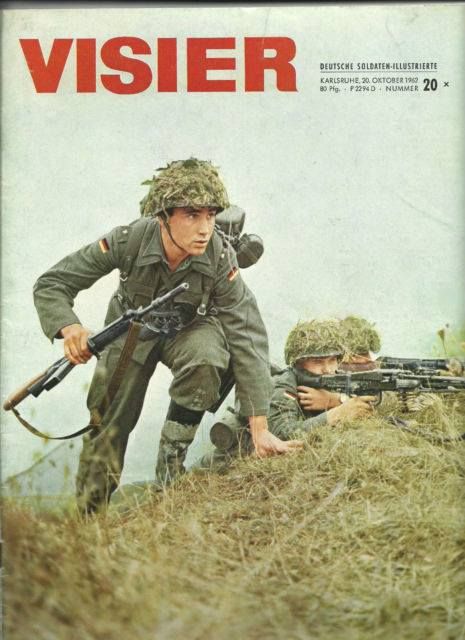
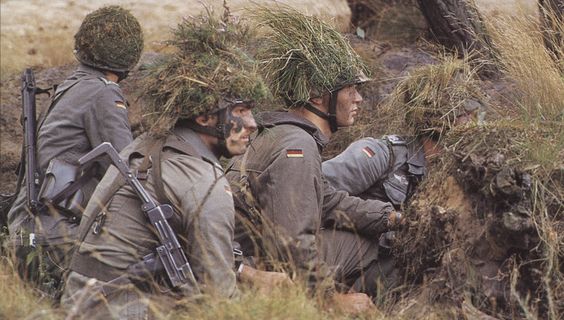
Der schwierigste Teil, dieses Mal, war es wirklich die richtige Farbe zu finden. Es ist unmöglich einen eindeutigen Farbton auszumachen. Wie auch das Feldgrau der Wehrmacht gibt es tausend verschiedene Töne bei der Bundeswehr Uniform. Also blieb mir nichts anderes übrig als das “Gefühl” der Farbe aufzugreifen. Aber als erstes möchte ich euch einige Bilder der Uniform zeigen um mein Problem zu verdeutlichen.
Welcome to our fourth tutorial for Team Yankee. This time I want to show you how to paint a German Bundeswehr Panzergrenadier.
The toughest part was to find the right color, because it is impossible to find a good picture of that uniform. Like the Feldgrau of the Wehrmacht there are thousand of different shades of the Bundeswehr uniform. So I had to catch the feeling of the color. First of all I want to show you some pictures to illustrate my problem.
Ebenfalls ein gutes Beispiel ist dieses Bild hier, welches die Variationen nochmals gut aufzeigt. Die Farbe der Uniform ist also etwas zwischen Grau und einem dunklen Olivegrün. Wir haben also viel Spielraum um zu interpretieren. So weit ich weiß, war RAL 6014 Gelboliv der offizielle Farbton. Allerdings orientiere ich mich lieber an alten Fotografien.
Ich habe das Tutorial bereits 2016 einmal gemacht und im Battlefront Forum veröffentlicht. Zwar war ich auch mit diesem Ergebnis zufrieden, jedoch dachte ich mir zwei Jahre später, dass es besser gehen müsste. In erster Linie geht es mir um die Farbwahl der Uniform.
You also can take a look at that image here, which shows the variety quite good. The color of the uniform is something between grey and dark olive green. That means we have a lot of room to interpret. As far as I know, RAL 6014 Gelboliv was the official color. However I prefer to take the color from old photos.
I made this tutorial the first time back in 2016 and showed it on the old Battlefront forum. Although I was happy with that result, I thought two years later that the choice of color for the uniform could be better.
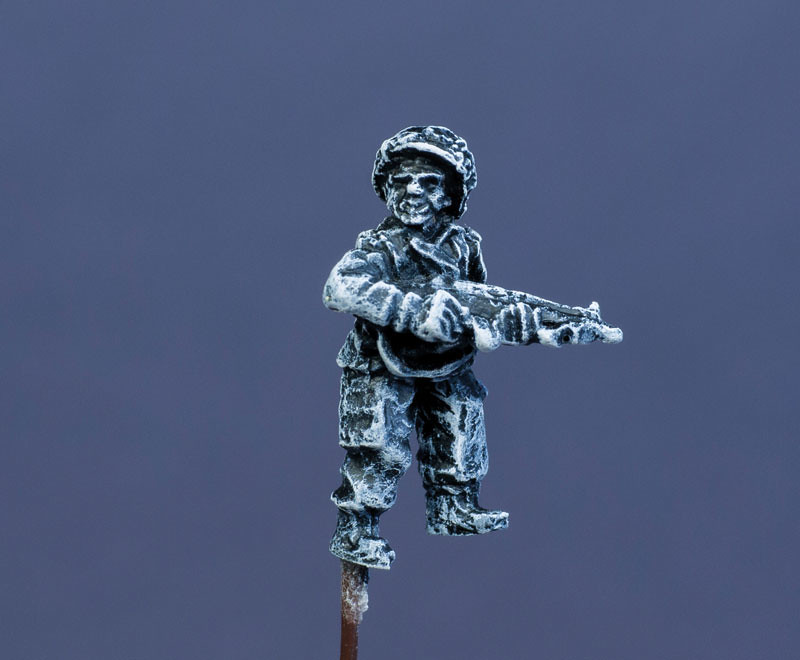
Step 01
In Schritt 01 gibt es nichts neues. Ich habe die Figur schwarz grunidert und mit weiß trocken gebürstet.
Nothing new here, I primed the miniature in black and drybrushed it white.
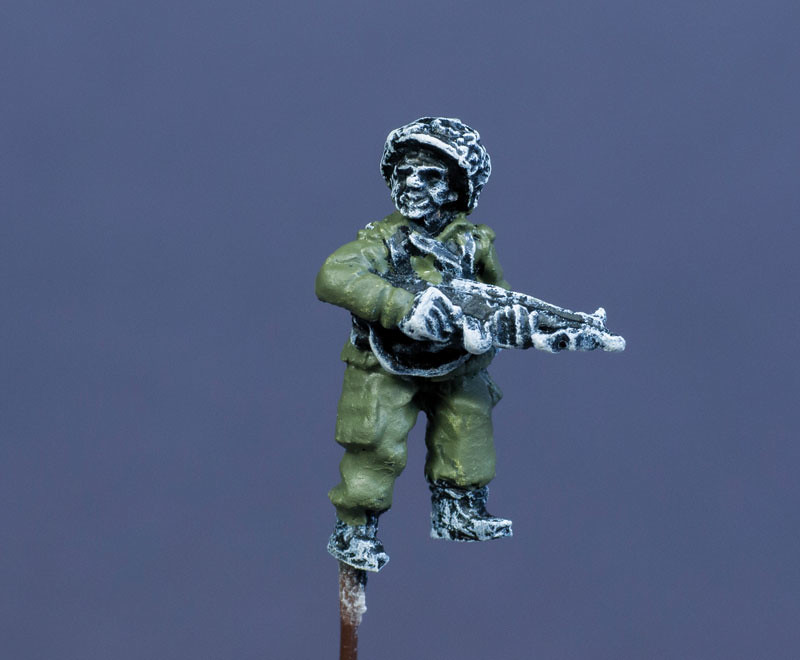
Step 02
Die Schattenfarbe ist VMC US Dark Green, welche ich auf die gesamte Uniform auftrug.
The shadow color is VMC US Dark Green, which I apply on the whole uniform.
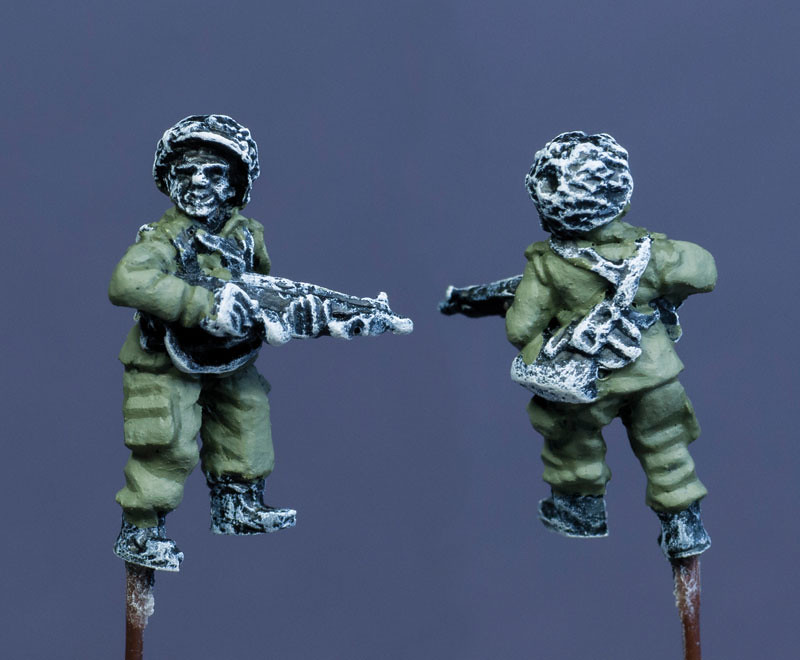
Step 03
Als Grundfarbe mischte ich VMC US Dark Green und VMC Green Grey (1:1) zusammen und bemalte die Uniform. Dabei ließ ich die tiefsten Stellen aus für den Schatten.
For the base color I mixed VMC US Dark Green and VMC Green Grey 1:1 together and painted it on the uniform. Leave some of the shadow color showing as shader in the recesses.
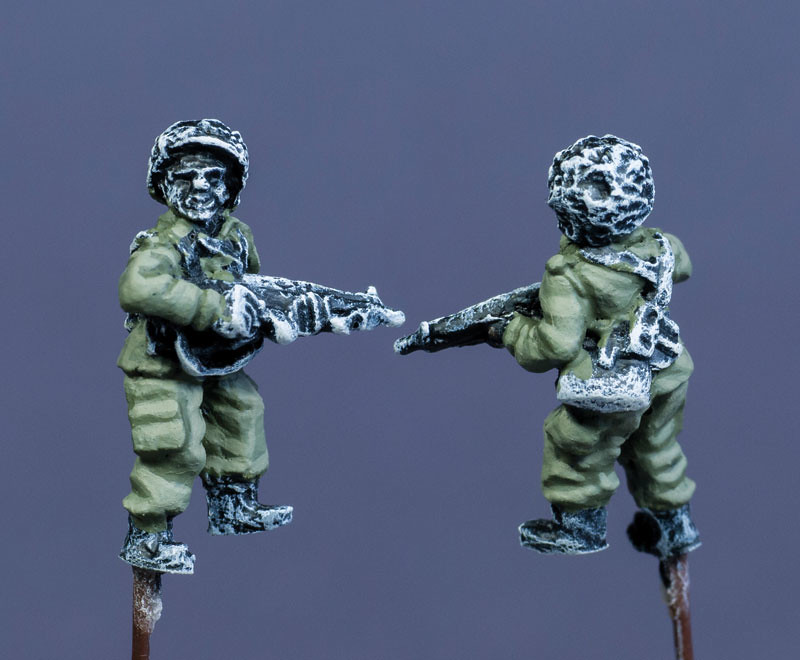
Step 04
Für die Akzentuierung benutzte ich reines VMC Green Grey, welches ich auf die erhabenen Stellen malte.
Paint pure VMC Green Grey as highlight on the raised areas.
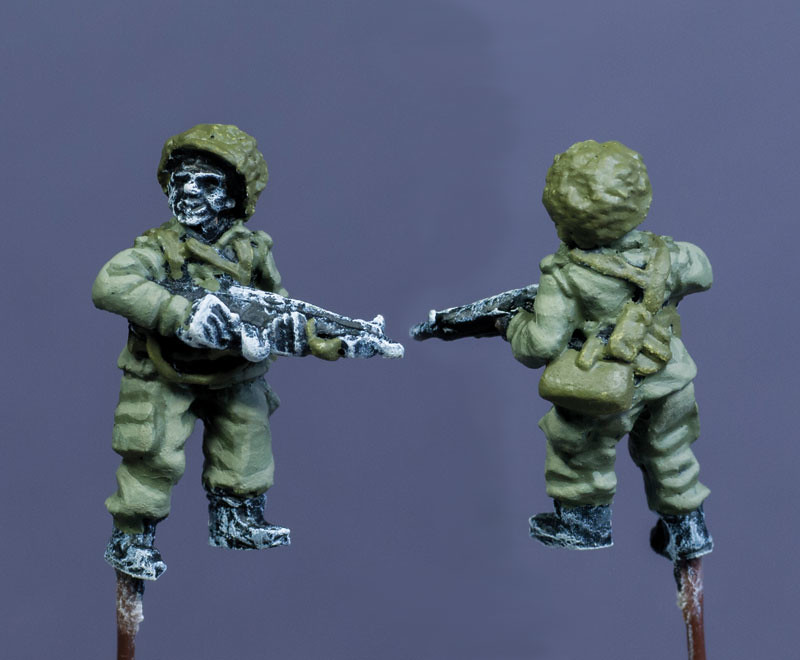
Step 05
Der Helm, die Gurte und Taschen wurden mit VMC Brown Violet bemalt.
The helmet, the webbing and the bags were painted with VMC Brown Violet.
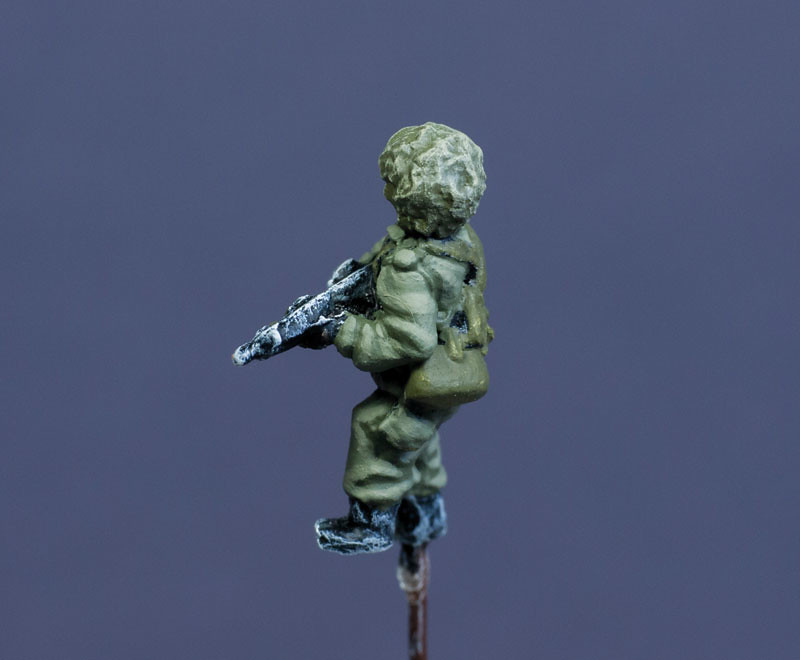
Step 06
Mit VMC Stone Grey wurde der Helm trocken gebürstet. Alternativ kann auch beige, VMC Dark Sand oder VMC Ivory verwendet werden.
Drybrush the helmet with VMC Stone Grey. You can also use beige, VMC Dark Sand or VMC Ivory.
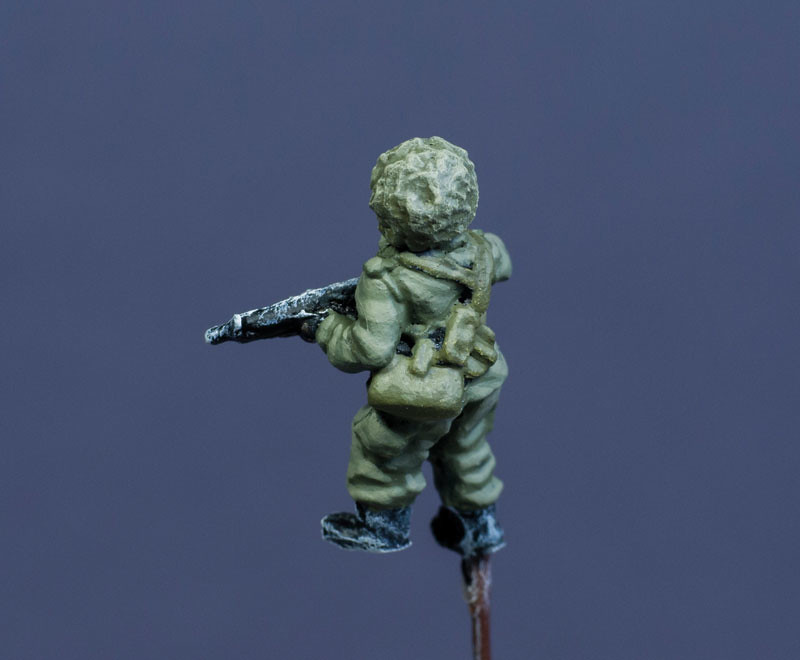
Step 07
Akzentuiere die Gurte und Taschen mit einer Mischung aus VMC Brown Violet und VMC Sunny Skin Tone (3:1). Es kann ein zweites Highlight gesetzt werden in dem man noch etwas mehr Sunny Skin Tone hinzufügt.
Highlight the webbing and bags by mixing some VMC Sunny Skin Tone to the base color VMC Brown Violet (3:1). You can apply a second highlight but adding more Sunny Skin Tone to it.
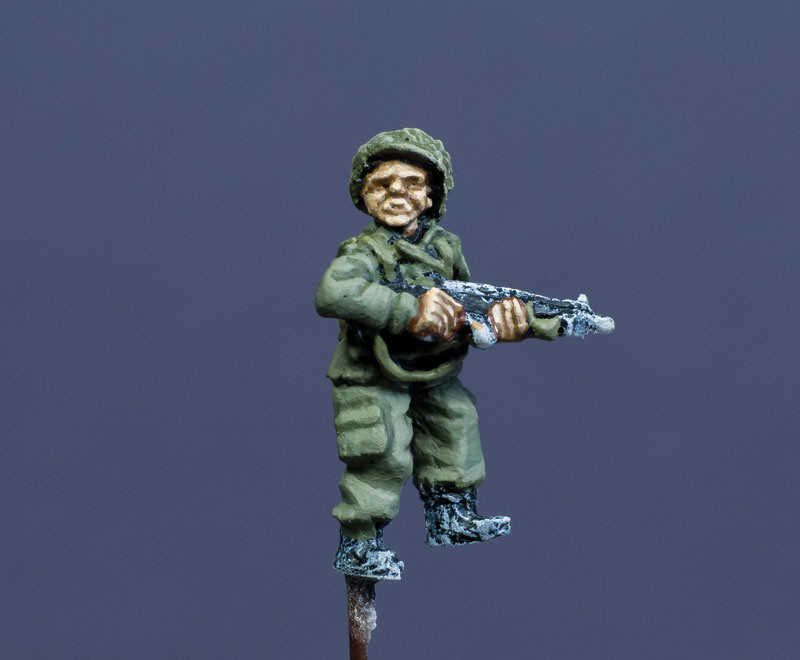
Step 08
Die Haut bemalte ich mit der Battlefront Methode. Für den Schatten benutzte ich VMC Beige Brown. Durch das hinzufügen von VMC Flat Flesh erhielt ich die Grundfarbe. Als erste Akzentuierung bentutze ich reines VMC Flat Flesh. Wenn man etwas weiß hinzufügt, kann man dann auch noch die erhabensten Stellen hervorheben (Nasenspitze oder Wangen).
I painted the skin the Battlefront way this time. Shadow color is VMC Beige Brown. Add some VMC Flat Flesh to it for the base color. The first highlight will be pure VMC Flat Flesh. With some white added to it you get a second highlight for the raised parts of the face (Nosetip or cheeks).
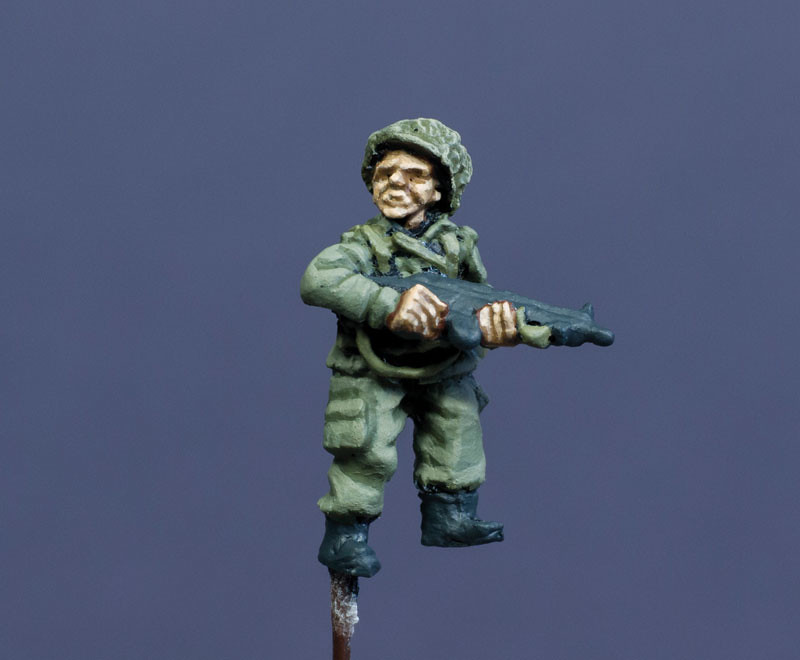
Step 09
Für die Stiefel und das G3 Gewehr verwendete ich VMC Black Grey.
The boots and the G3 rifle were painted VMC Black Grey.
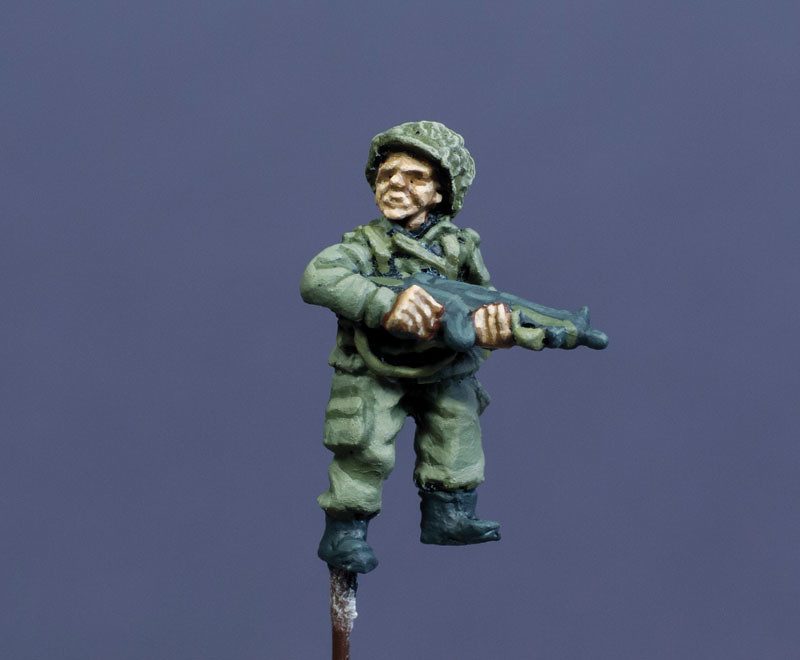
Step 10
Durch das hinzufügen von VMC Sunny Skin Tone zu VMC Black Grey erhielt ich die Akzentfarbe für das Gewehr. Du kannst auch eine zweite Akzentuierung vornehmen in dem du mehr VMC Sunny Skin Tone hinzufügst. Alternativ kann man auch beige oder weiß verwenden. Im Großen und Ganzen wären wir jetzt fertig mit der Figur. Mit einer Schicht Klarlack kann man seine Arbeit noch schützen. Die folgenden Schritte sind daher optional.
By adding some VMC Sunny Skin Tone (alternative: beige or white) to VMC Black Grey I got a highlight for the rifle. You can apply a second highlight if you want to. Don’t forget to paint the stock and the front handle with VMC US Dark Green. All in all we are done now with the miniature and with a coat of varnish you can save your paint job. The following steps are therefore optional.
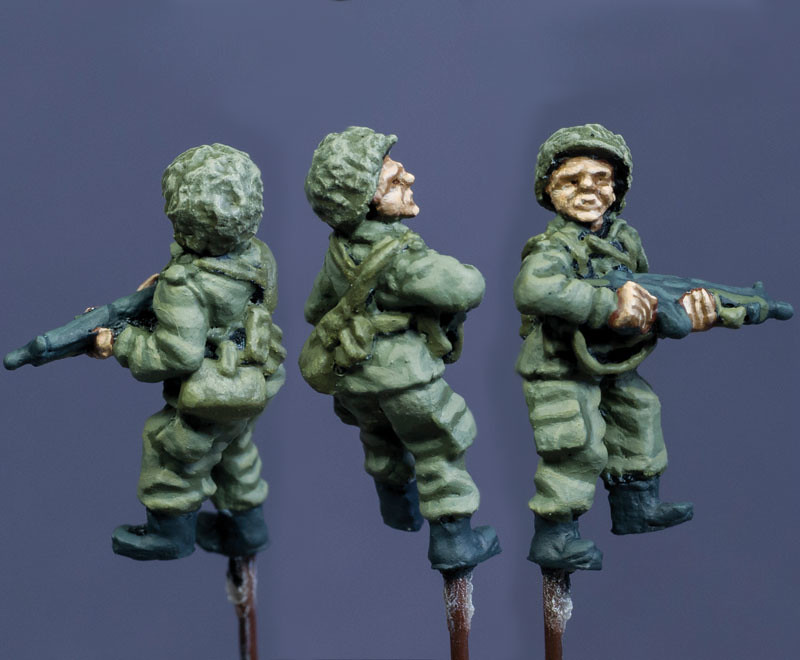
Step 11
Falls dir die Uniform zu dunkel ist oder du etwas mehr Kontrast haben möchtest kannst du sie nochmals akzentuieren. Mische einfach etwas VMC Stone Grey (oder weiß) und VMC Green Grey zusammen. Eine andere Möglichkeit wäre die Schatten zu verdunkeln indem man im ersten Schritt etwas schwarz zur Schattenfarbe mischt.
If the uniform is not bright enough for you, you can apply a second highlight. Just mix some VMC Stone Grey (or white if you don’t have that color) to VMC Green Grey. Another option would be to add some black to the shadow color in the first step.
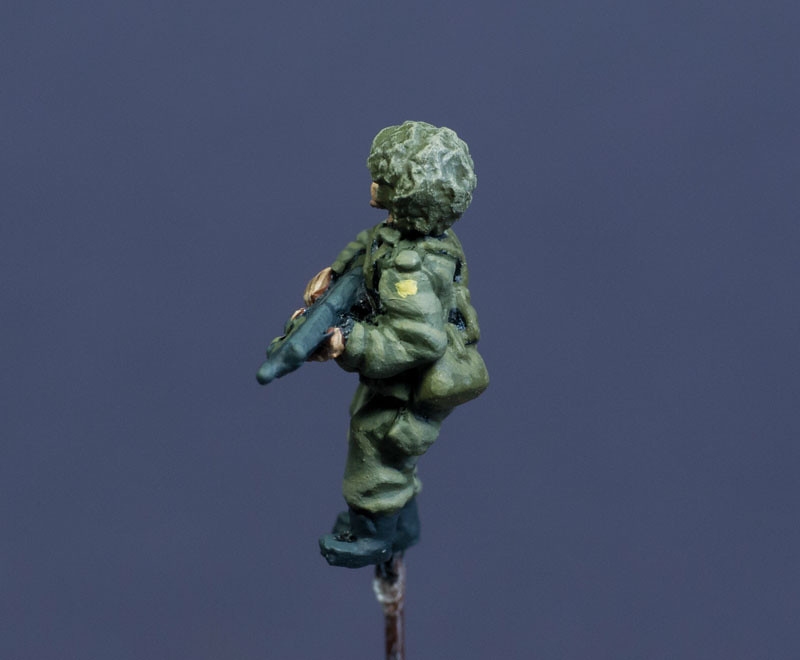
Step 12
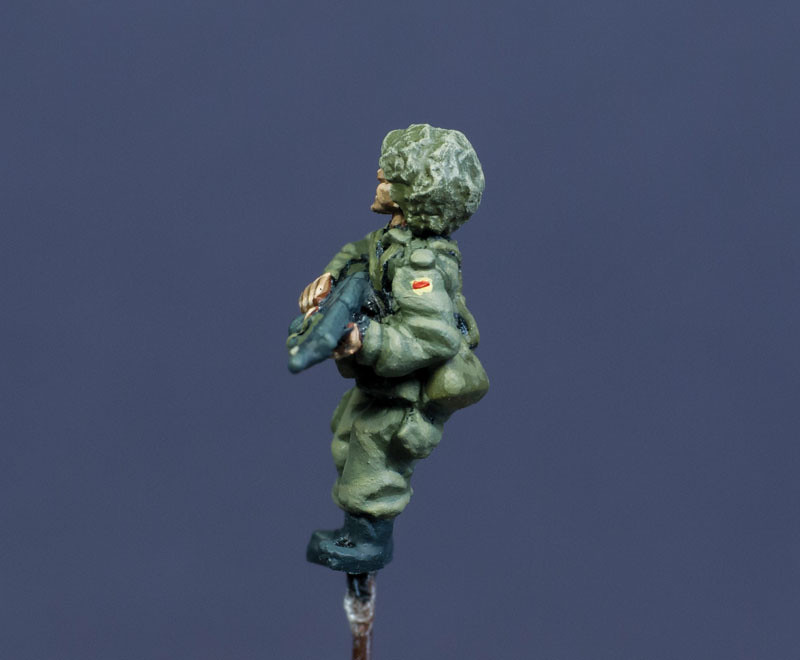
Für das Hoheitszeichen malte ich ein kleines Rechteck aus VMC Sand Yellow auf beide Arme.
Paint a small rechtangle with VMC Sand Yellow on both arms for the German flag patch.
Step 13
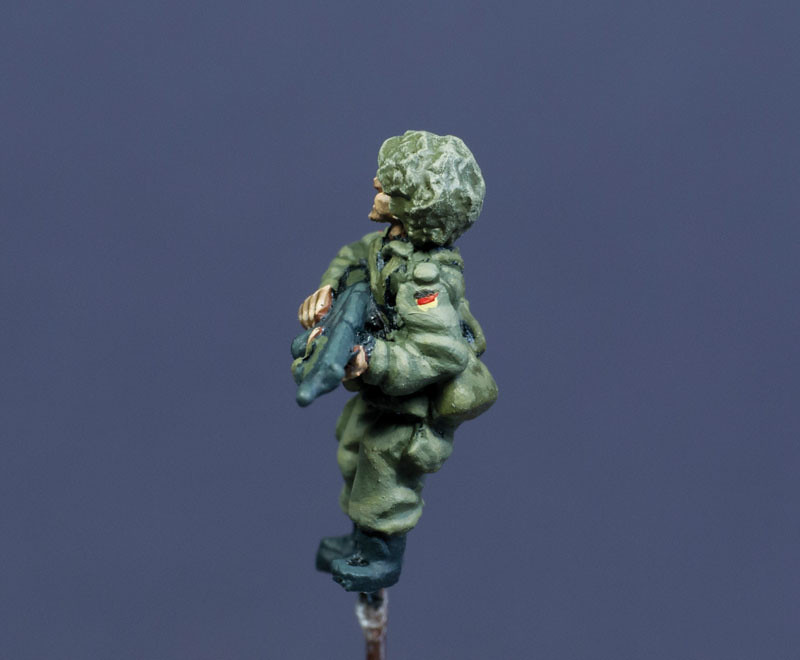
Ziehe eine dünne rote Linie mit VMC Flat Red in die Mitte des Rechtecks.
Apply a thin small red line with VMC Flat Red at the center of the rectangle.
Step 14
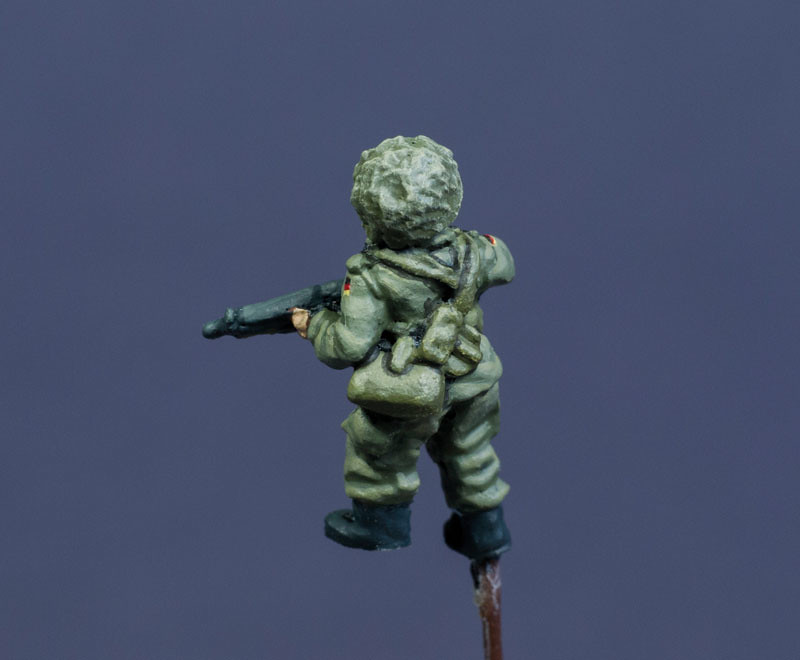
Zum Abschluss kommt noch eine schwarze Linie oben drüber. Zum ausbessern der Form verwendete ich Green Grey.
To finish the flag just paint a small black line on top. You can fix the shape of the patch with Green Grey.
Step 15
Wenn man schon dabei ist schwarz zu verwenden kann man auch noch die tiefsten Stell mit einer schwarzen Linie versehen. Dazu mischte ich etwas US Dark Green zum schwarz dazu damit es nicht zu unrealistisch aussieht.
While already using black you can black line the deep areas. For that I add a drop of US Dark Green to the black so it won’t look to unrealistic.
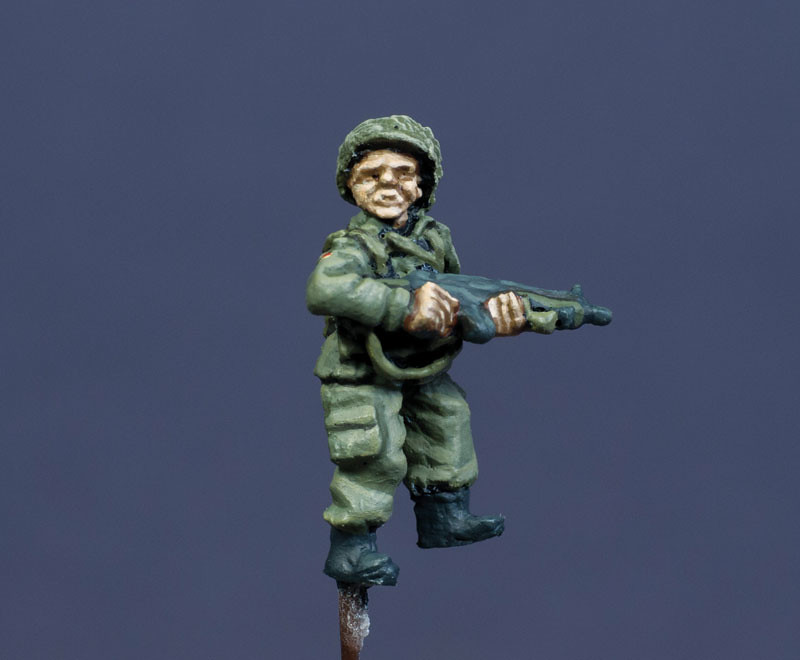
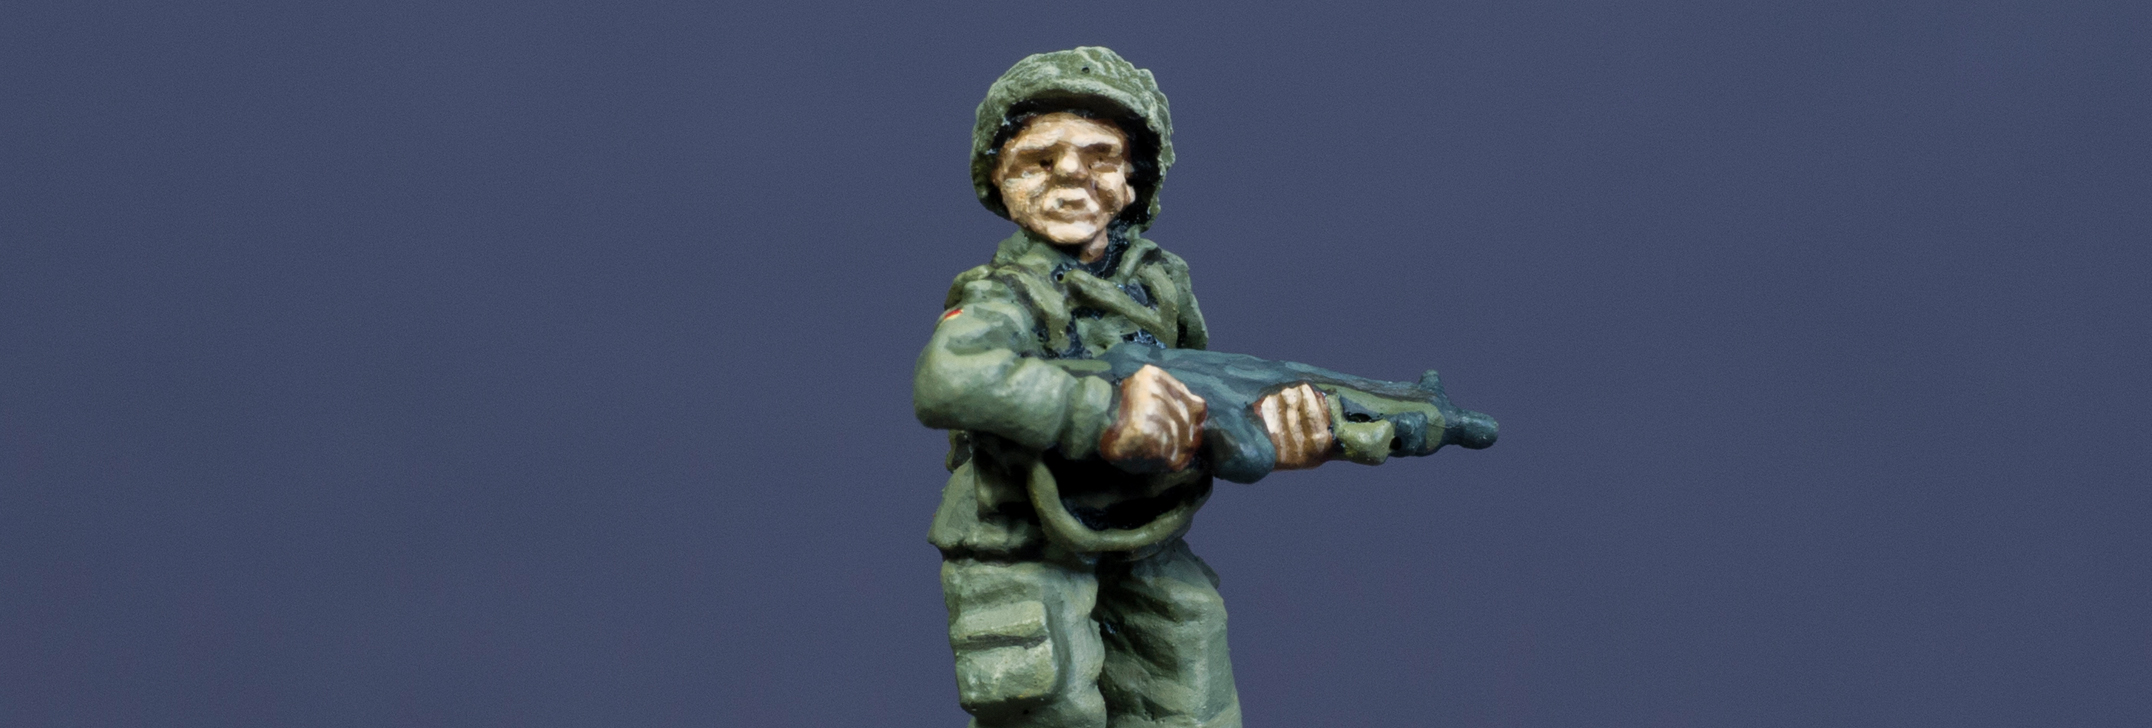
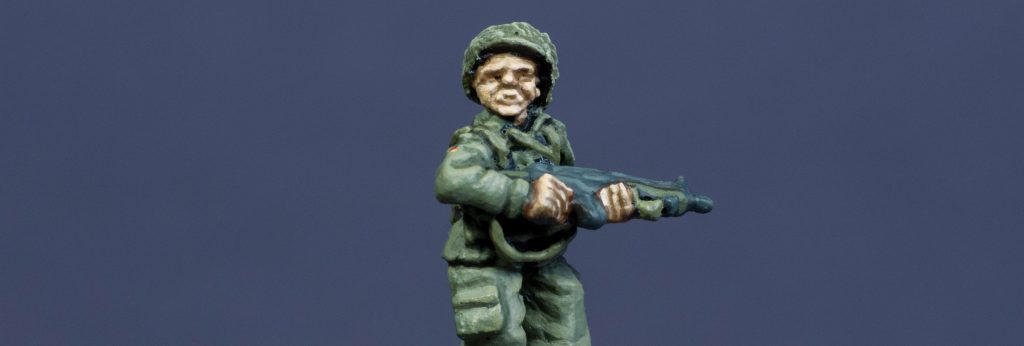
Und hier haben wir unseren fertigen Panzergrenadier:
And here we have the finished Panzergrenadier:
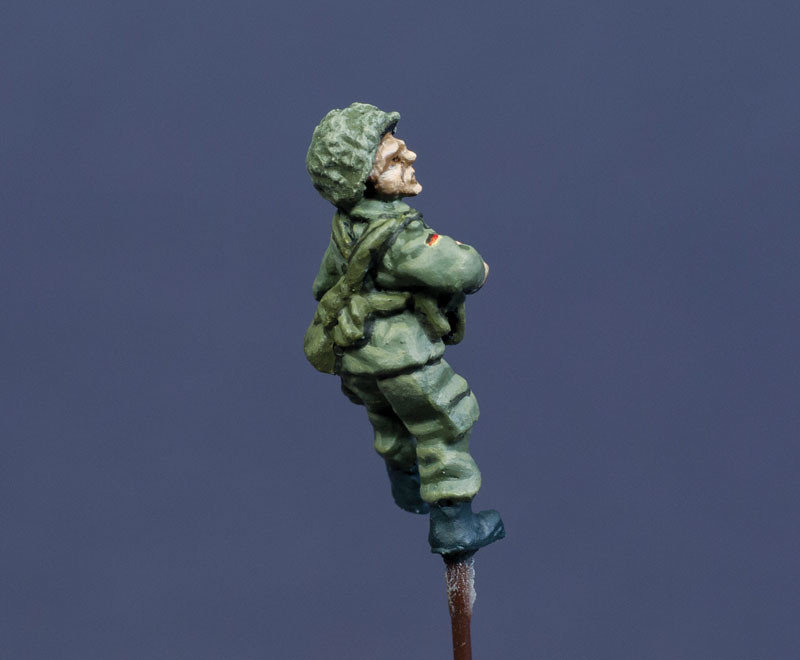
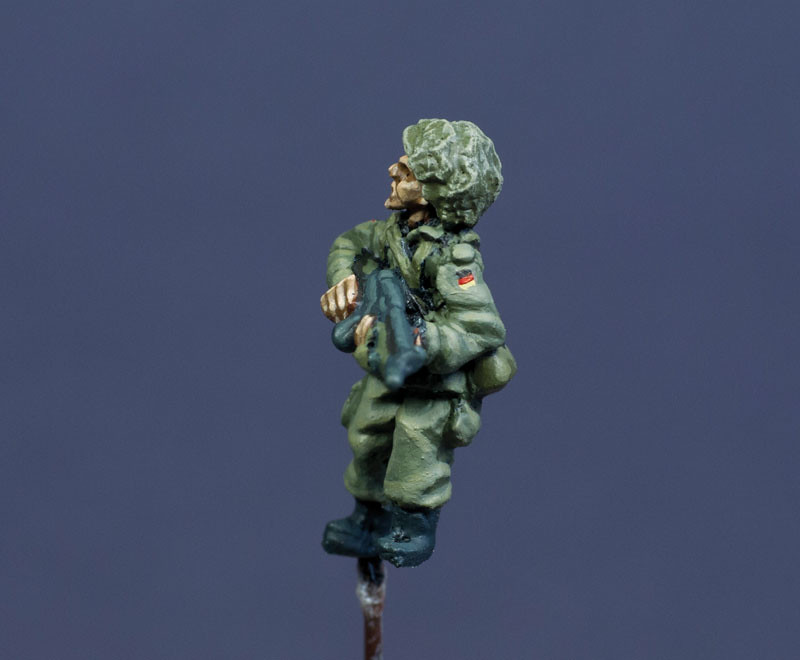
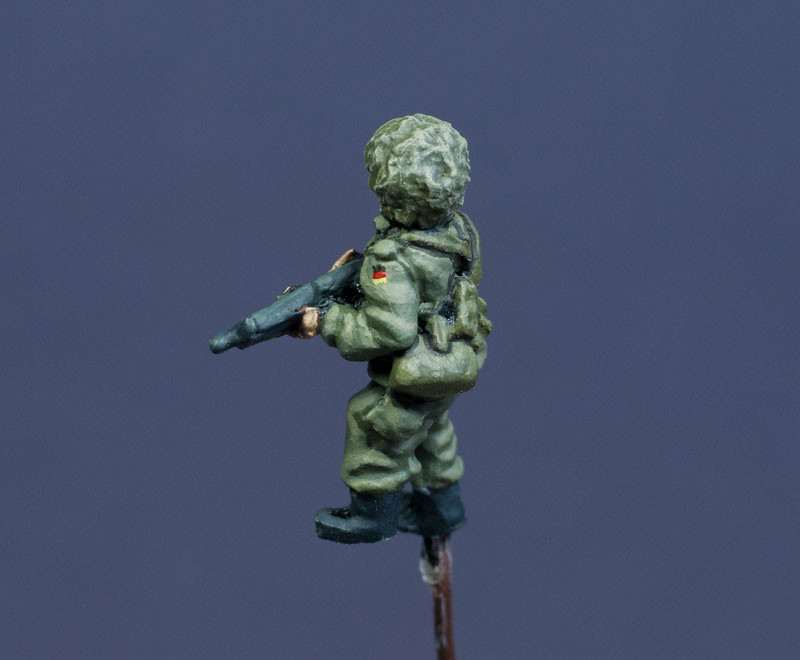
Ich hoffe euch gefiel mein Tutorial und falls ihr das Ganze als Video sehen wollt, hinterlasst mir doch ein Kommentar.
I hope you enjoyed this tutorial and if you want to see it as a video just leave a comment below.

Hervorragendes Tutorial! Besten Dank!