
Modern American Infantry Painting Tutorial
Willkommen zu unserem zweiten Tutorial für Team Yankee. In dem folgenden Artikel möchte ich zeigen wie man Amerikanische Infanterie (um 1985 rum) bemalen kann. Das Ziel ist einen bereits gehobenen Tabletop-Standard zu erzielen und das so einfach wie möglich. Bei diesem Tutorial liegt der Schwerpunkt auf dem Tarnmuster, welches die Soldaten getragen haben. Trotz viel Recherche und Versuche war es schwer die perfekten Farben zu finden. Am Ende war ich doch recht zufrieden mit dem was rauskam
Welcome to our second tutorial for Team Yankee. In the following article I want to show you how to paint American Infantry (1985). The goal is to achieve a high table-top standard as easy as possible. The focus of this article is the camo pattern of the uniforms. I looked at a lot of pictures and tested a lot of colors but it was difficult to get the perfect colors. But at the end the result is quite pleasant, if you ask me.
Im Folgenden habe ich einige Bilder herausgesucht, welche die Tarnung im “Original” zeigen. “Woodland” ist wohl die bekannteste Tarnung überhaupt. 1981 eingeführt, wurde sie erst 2006 komplett ersetzt. Das heißt es war fast 30 Jahre im Einsatz.
Im Großen und Ganzen besteht es aus vier Farben: Grün, Braun, Khaki und Schwarz. Das Grün ist sehr kräftig mit einem gewissen Olivanteil. Je nach Bild oder Druck(glücklicherweise bin ich ebenfalls im Besitz solch eines Hemdes) ist das Braun mal mehr mal weniger rötlich. Das Khaki ist mal heller mal dunkler. Zuweilen hat es auch mal einen Grünanteil. Die einzige Farbe die kein Problem darstellt ist Schwarz. Je nachdem habe ich die Vallejo Farben ausgewählt.
On the next few paragraphs you will see a few pictures of the “original” pattern. The “Woodland” camouflage is possibly the most famous camouflage of all. It was issued in 1981 until its replacement around 2006. That means it was in use for a very long time.
The pattern consists of four colors: Green, brown, khaki and black. The Green is a strong one with some olive in it. It depends on the picutre or the print of the pattern (luckily I’ve got one of those shirts) the brown is sometimes more, sometimes less reddish. There is a huge variety of the khaki out there. Sometimes it is really bright, sometimes it is dark or it is quite green.The only easy color to paint is black. According to that I’ve chosen the Vallejo colors.
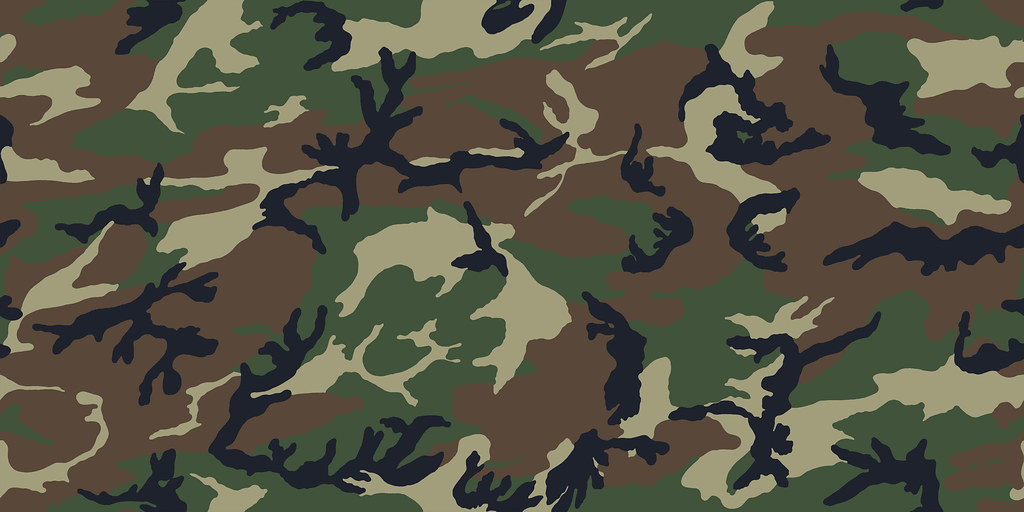
Hier das Muster im Überblick.
The overview of the pattern.
Source: http://wallpapercave.com
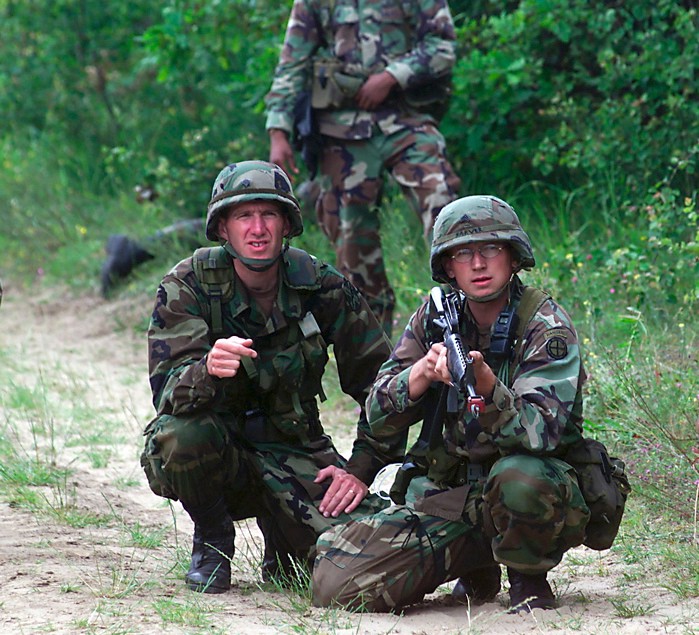
Das Bild ist zwar von 2000 aber zeigt die Tarnung und die Farben trotzdem sehr gut.
This picture was taken in 2000 but it shows the camouflage and the colors really good.
Source: https://en.wikipedia.org/wiki/U.S._Woodland
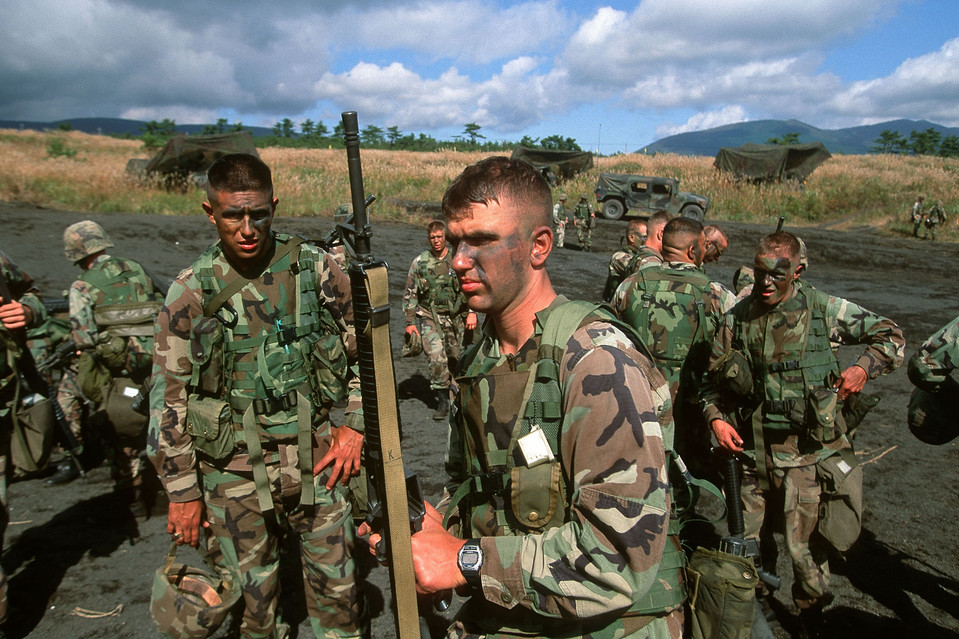
Auch dieses Bild ist von 2002.
Also this picture is from 2002.
Source: http://www.wsj.com/articles/SB10001424127887323566804578551662597144702
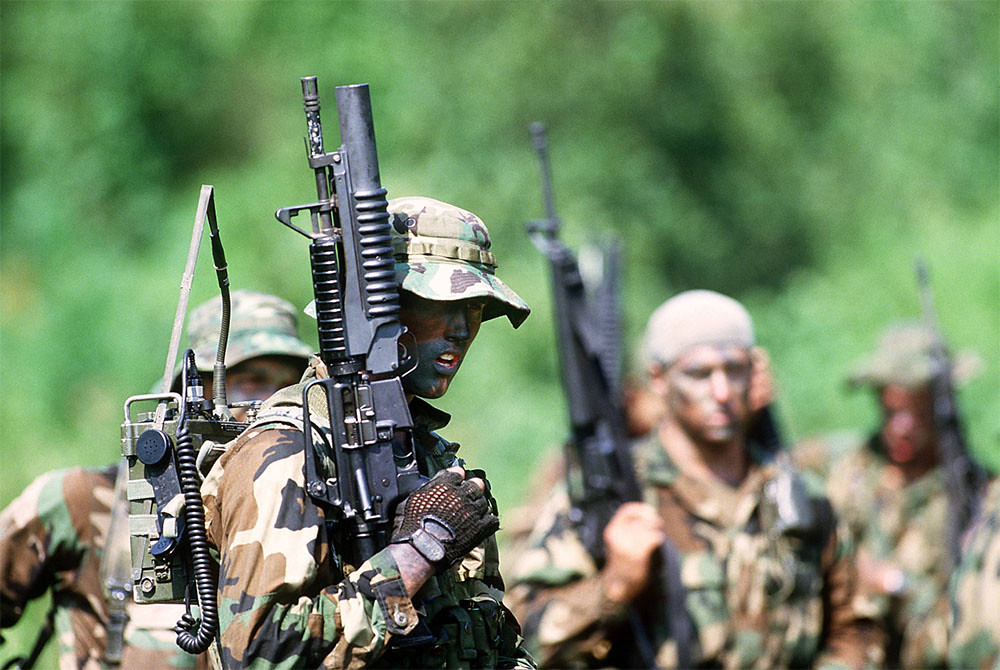
Laut der Website von der ich dieses Bild habe ist es von 1987.
According to the page where I got this picture from, it is from 1987.
Source: https://c2.staticflickr.com/2/1686/24668874026_afb17b0b05_b.jpg
Beginnen wir mit dem Tutorial.
Ich verwende für fast alle Schritte Vallejo Farben. Diese Unterscheiden sich in Vallejo Model Color (im folgenden VMC) und Vallejo Game Color (im folgenden VGC). Die einzige Ausnahme bei mir bildet Schwarz, Weiß und Beige. Diese habe ich von anderen Farbherstellern (Lukas, Lascaux oder Schmincke).
Let’s start with the tutorial.
Most of the time I am using Vallejo Model Color (VMC) or Vallejo Game Color (VGC). Only black, white and beige are from other companies (Lukas, Lascaux or Schmincke).
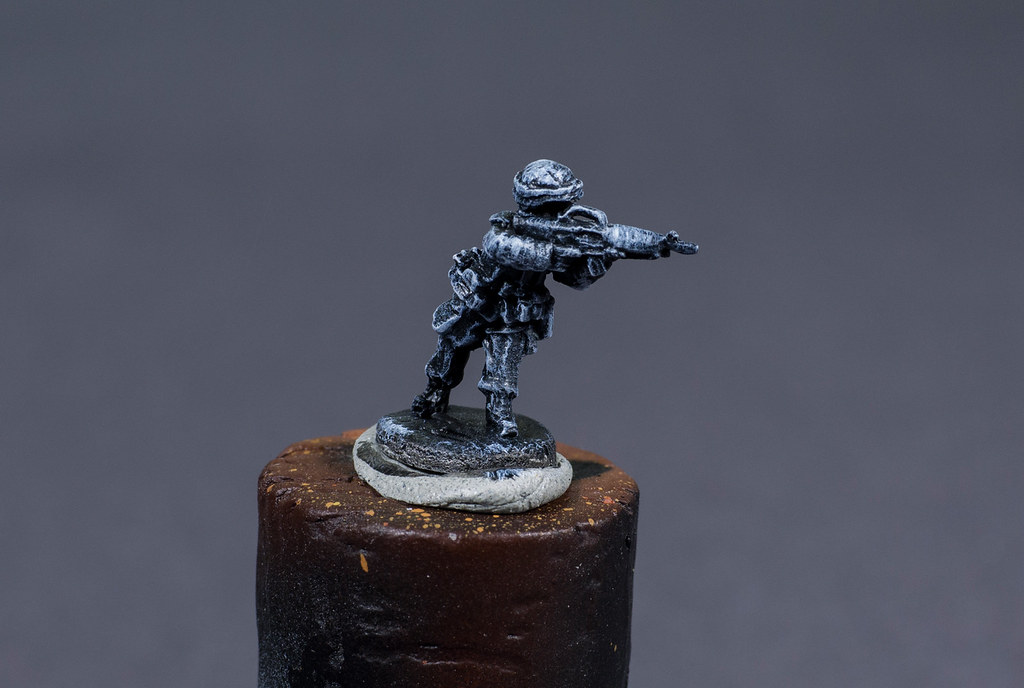
Step 01
Als erstes wurde die Figur Schwarz grundiert. Um die Details besser sichtbar zu machen habe ich die Figur noch weiß trockengebürstet, allerdings ist das nicht unbedingt notwendig.
First of all I primed the miniature black. After that I drybrushed it white to see the details better but it is not really necessary.
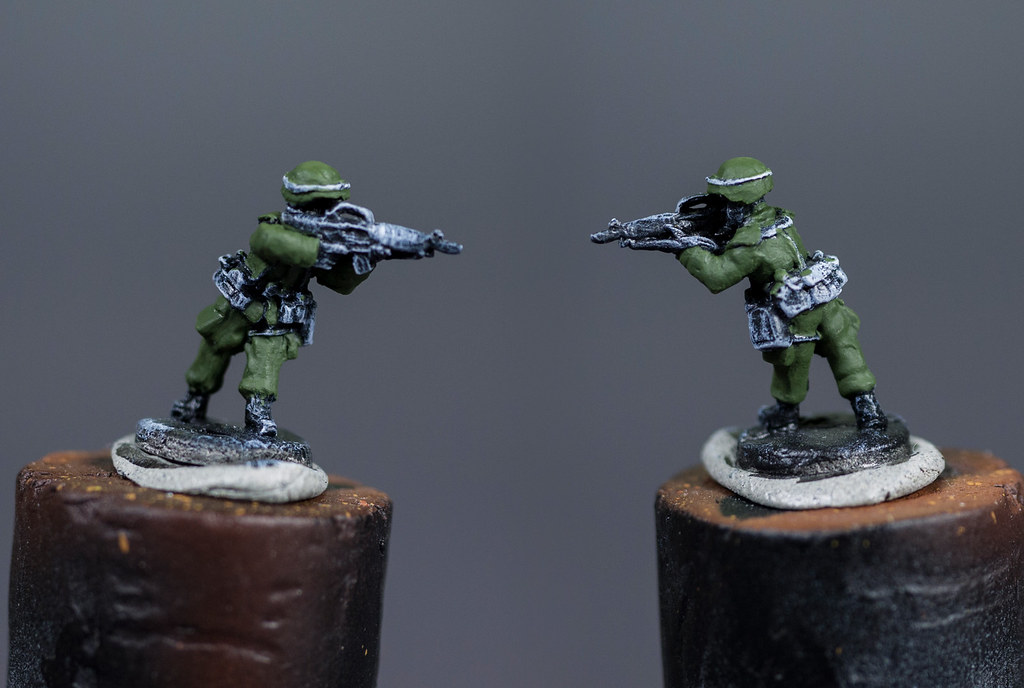
Step 02
Die Grundfarbe für die Tarnung ist VMC Camo Olive Green, welches den Originalfarbton in meinen Augen perfekt trifft.
The base color of the camo is VMC Camo Olive Green, which is the perfect choice, if you ask me.
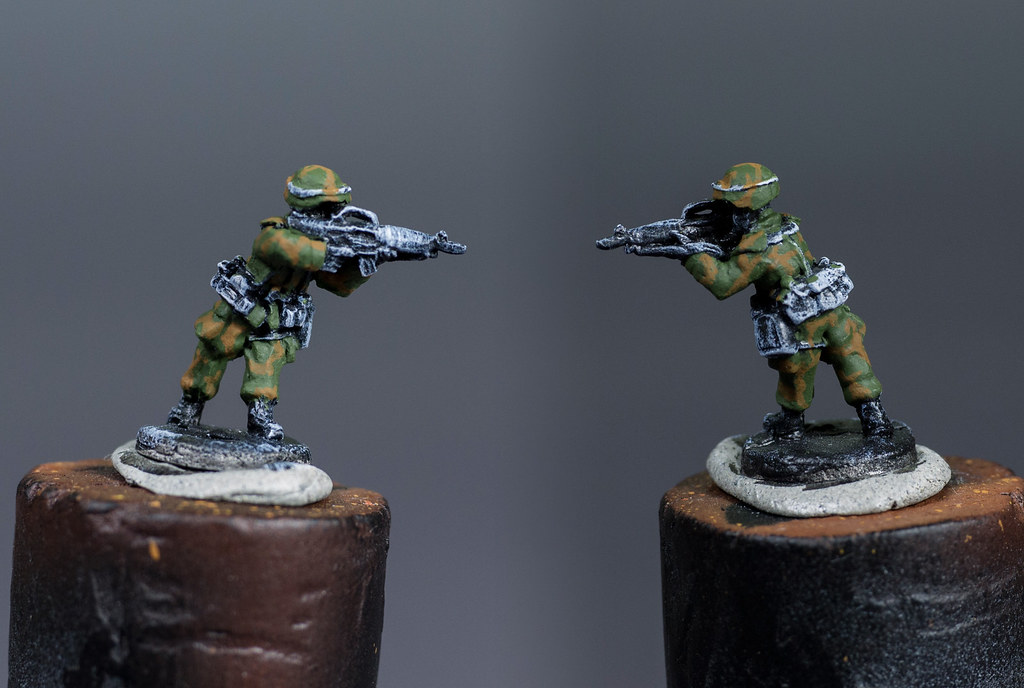
Step 03
Die zweite Farbe ist VMC Flat Earth. Wie gesagt, der Braunton ist schwierig. Alternativ dazu kann man VMC German Camo Medium Brown, Flat Brown oder Mahogany Brown benutzen. Die Flecken können bei Bedarf auch größer gemalt werden.
The the second color is VMC Flat Earth. As I said, brown is kind of complicated. You also can use VMC German Camo Medium Brown, Flat Brown or Mahogany Brown. You can paint the brown areas even bigger, if you want to.
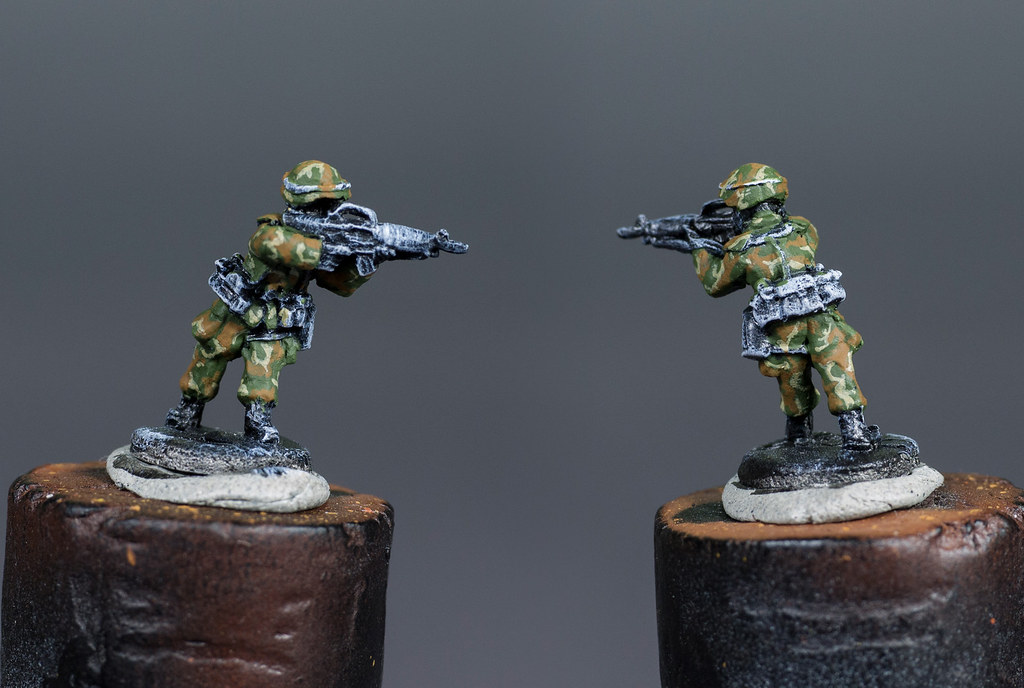
Step 04
Als dritte Farbe verwendete ich VMC Khaki, welches ich mit einem Tropfen Weiß vermischte, damit es ein wenig mehr leuchtet. Die Khakiflecken sind etwas kleiner als die Braunen und verzweigen sich auch stärker, wie man hier sehen kann.
I added one drop of White to my third color, which was VMC Khaki. The Khaki spots are smaller than the brown ones. It is really good to see on that picture.
Step 05
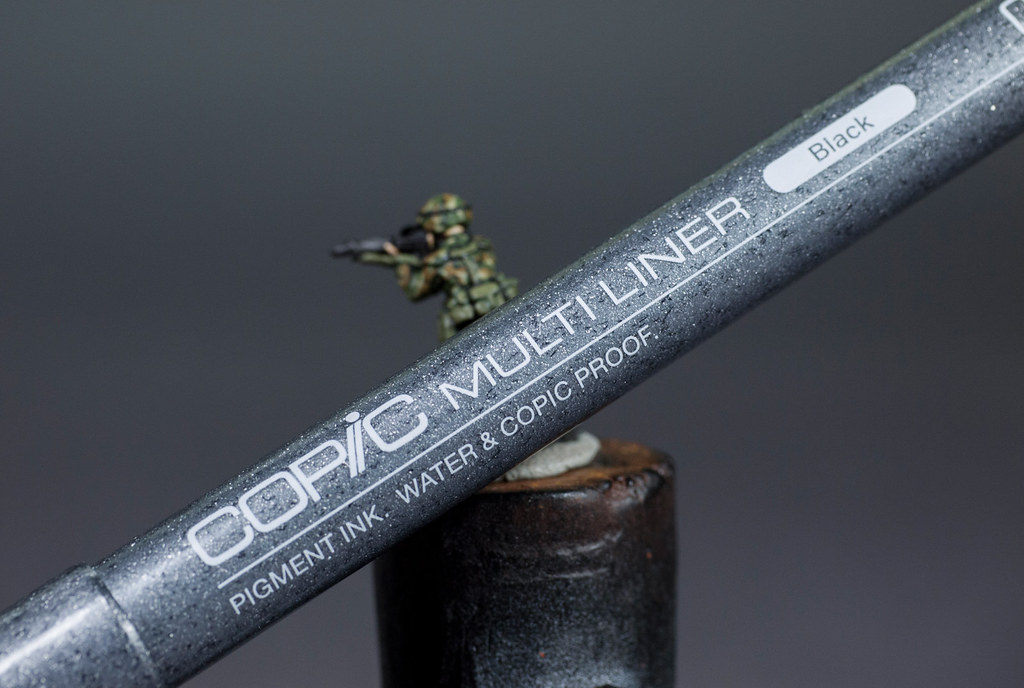
Für das Schwarz mischte ich etwas Beige hinzu, da ich in der Regel versuche reines Schwarz nicht zu malen. Es wirkt einfach realistischer. Die schwarzen Flecken sind dünn und sehen ein bisschen aus wie Adern. Wer es sich nicht zutraut so dünne Linien mit einem Pinsel zu malen, kann auch einen Fineliner nehmen. So einen zum Beispiel.
For the Black I used a mixture of Black and Beige (around 6:1), which where nearly Black. Pure black looks a little bit unreal so I try to avoid painting it. A dark grey looks better. The Black lines are really thin and remind me of vains. If you think you are not capable painting such thin lines with a brush, you can also use a fine liner, like this one here.
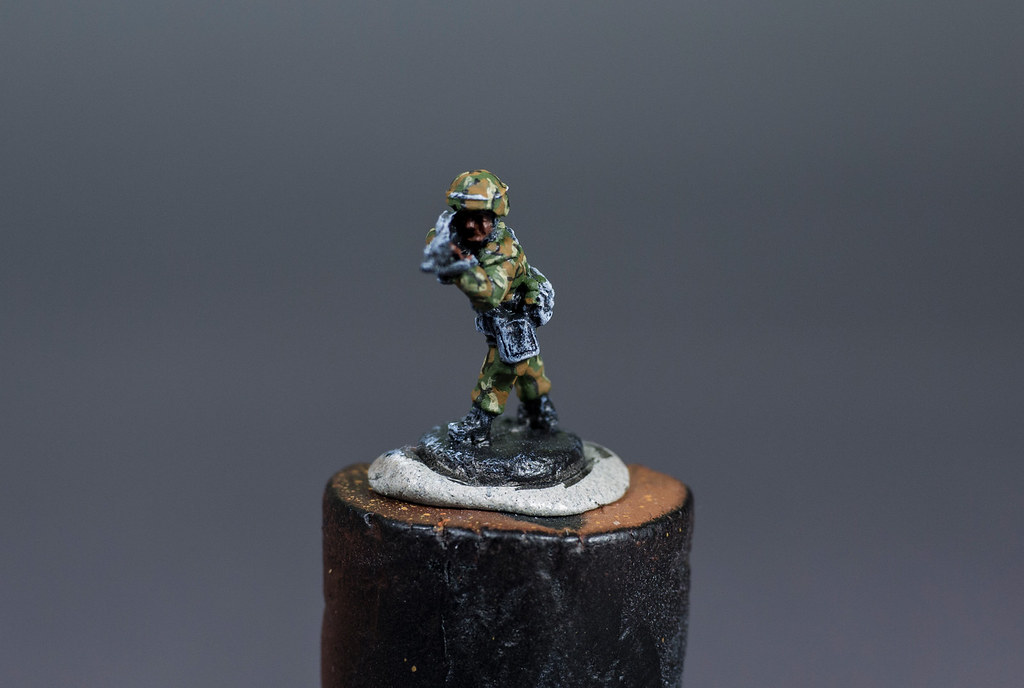
Step 06
Das Gesicht wurde auf die gleiche Weise bemalt wie bei den Russen. Die Schattenfarbe war VMC Flat Brown.
The Skin was painted the same way as the Russian one. VMC Flat Brown was the shadow color.
Step 07
Danach wurde VMC Flat Flesh aufgetragen.After that VMC Flat Flesh was applied.

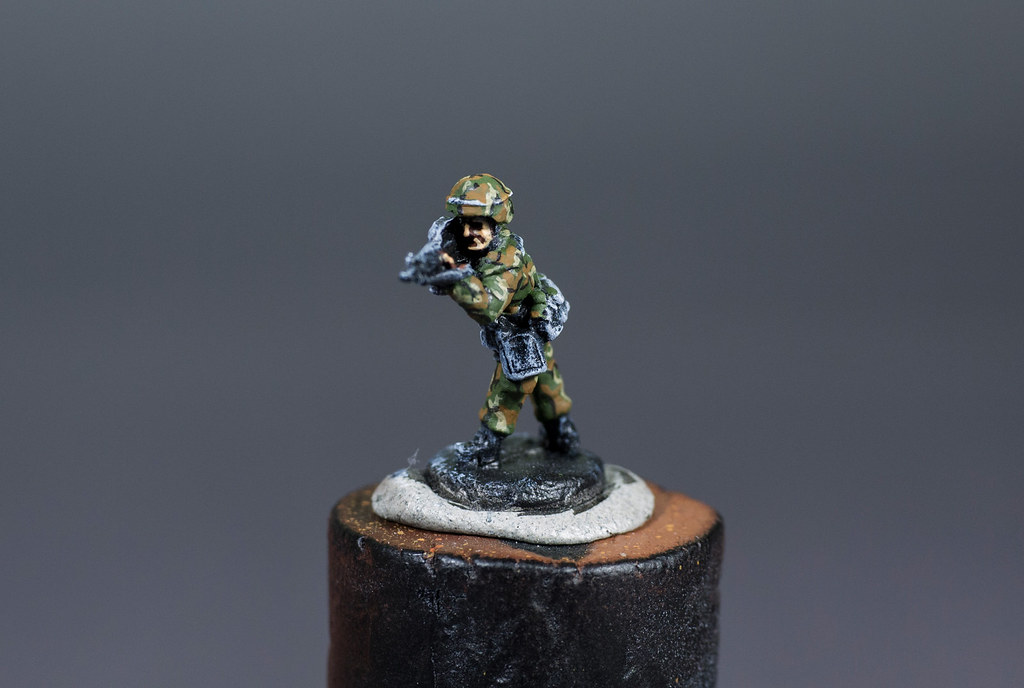
Step 08
Für die Akzente mischte ich Flat Flesh mit etwas Weiß und bemalte das Kinn, die Wangen, die Nasen- und Fingerspitzen und die Knöchel.
For the highlights I mixed Flat Flesh and White together and painted the chin, the cheeks, the nose- and fingertips and the knuckles.
Step 09
Details, wie die Waffe, Taschen und Gurte, wurden Schwarz grundiert.
Details, like the weapon, bags and webbing, got a black primer.
Step 10
Gurte und Taschen wurden VMC Brown Violet bemalt. Möchte man etwas mehr Kontrast, kann man es auch in drei Schichten Bemalen. Für die Schatten einfach etwas Schwarz dazumischen und für die Akzente etwas Beige.
The webbing was painted with VMC Brown Violet. If you want to get more contrast you can apply three layers. For the shadows just add some Black and for the highlights some Beige. I just added some Highlights.
Step 11
Die erhabenen Teile der Waffe wurden mit einem dunklen Grau bemalt (circa 5:1), welches ich ebenfalls aus Schwarz und Beige mischte. Wer sich fragt warum ich Beige zum mischen von Grau verwende, es ergibt einfach ein wärmeres Grau. Ebenfalls verliert es seinen Blaustich.
The raised parts of the rifle were again painted with a mixture of Black and Beige (around 5:1). I use Beige instead of White for a Grey mixture because you will get a warm Grey with Beige or Rose and a cold one with White.
Step 12
Wie schon erwähnt für manche Schritte kann man auch einen Fineliner (hier Copic Fineliner 0,05) benutzen, so auch für den Folgenden.
You also can use a fineliner (in this case Copic Fineliner 0,05) for some steps.

Mit dem Fineliner zog ich die Schatten unter den Schulterstücken und der Weste nach.
I used the fineliner to paint some shadows under the shoulderpads and to create some shadows for the vest.

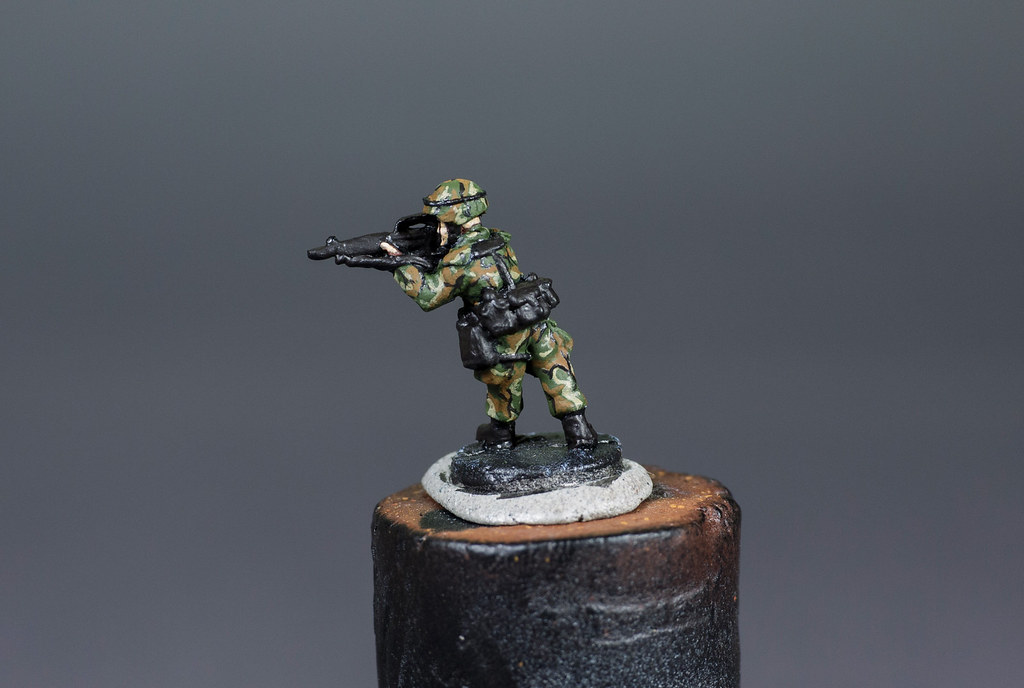
Step Finish
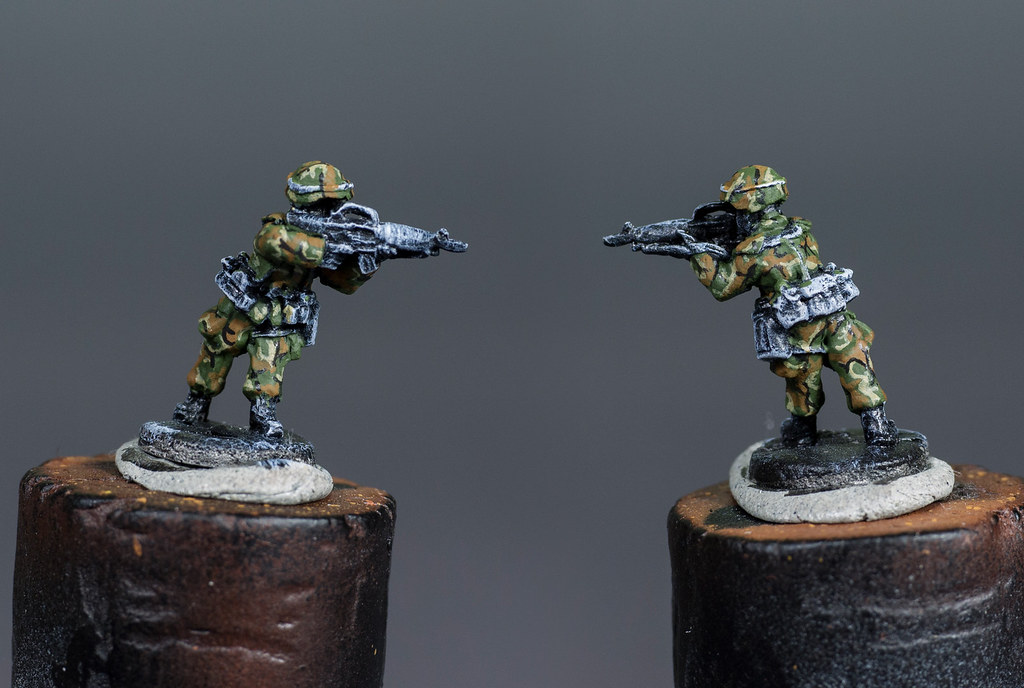
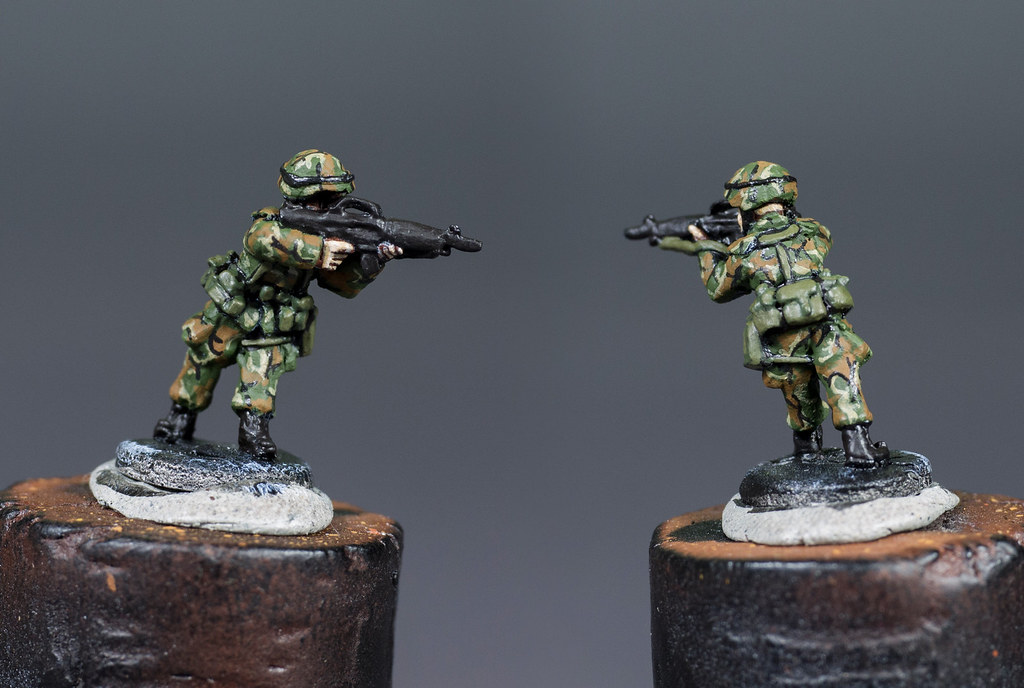
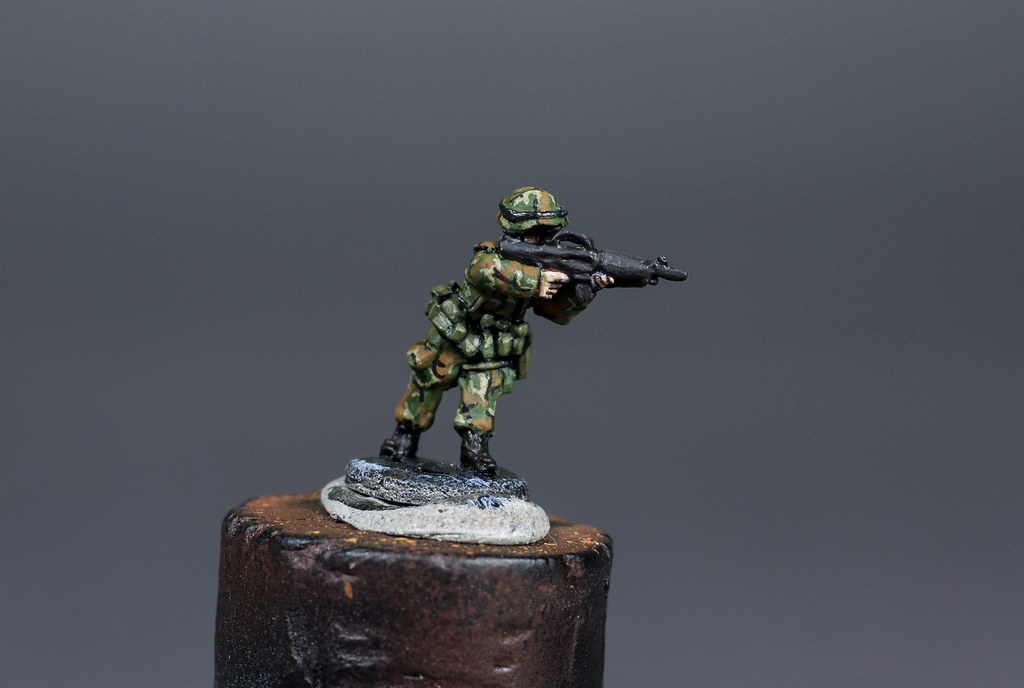
Zum Schluss wurde noch eine Schicht Mattlack aufgetragen. Wer sich fragt warum kein Wash oder der Gleichen für die Kleidung benutzt wurde, so kann ich nur sagen. dass es reichlich wenig Sinn macht. Die Tarnung ist zu komplex und die Schwarzen Linien verschlucken einiges. Natürlich hab ich verschiedene Sachen probiert, aber nichts davon war zufriedenstellend, daher hab ich einfach darauf verzichted. Wie das Ganze dann als Platoon aussieht könnt ihr hier sehen.
To protect my paintjob I applied some matt varnish for the finishing. You may ask youself why I didn’t use a wash for the uniform? I tried it, but the camo pattern is too complex and together with the black lines of the pattern you can barely see the shadows. So I skipped that and I am still happy with the result. If you want to see the full platoon, just click here.
Ich hoffe euch gefiel mein Tutorial und falls ihr das Ganze als Video sehen wollt, hinterlasst mir doch ein Kommentar.
I hope you enjoyed this tutorial and if you want to see it as a video just leave a comment below.
Die GIs sehen richtig klasse aus! Muß ich sofort ausprobieren! Super Tutorial! Bitte weitermachen: Wie wäre es mit den Polen oder Tschechoslowaken?