Modern Soviet VDV Infantry Painting Tutorial
Willkommen zu unserem dritten Tutorial für Team Yanke. Diesesmal betreten wir den fiktiven “what-if” Bereich. Im folgenden Artikel möchte ich zwei Optionen zeigen wie man VDV Infanterie bemalt. Zum Beispiel kann diese Methode für eine Assault Landing Company verwendet werden. Auch dieses Mal liegt der Schwerpunkt auf den Tarnmustern.
Ich werde zwei Tarnmuster für die Figuren verwenden. Eine davon ist die Butane Tarnung (eine frühe Ausführung der TTsKO Tarnung) und die Berezka Tarnung, welche bereits im Afghanistankrieg zum Einsatz kam. Meine Inspiration für diese Kombination stammt aus dem Spiel World in Conflict. In Typ B wird man die Kombination aus beiden Mustern sehen. Wenn ich schon bei Typ B bin, es gibt eine Menge farbliche Varianten der Butane Tarnung, wie man unten sehen kann. Deswegen werde ich auch zwei Varianten der Bemalung dafür hier aufzeigen.
Welcome to our third tutorial for Team Yankee. This time we enter a fictional “what if” theme. In the following article I want to show you how to paint Russian VDV Infantry. You can use that method four your Assualt Landing Company. Again I focus on the different camo patterns. Therefore I created two types, which I show in this tutorial.
I’m going to use two Camo patterns. One is the Butan camo (an early version of the TTsKO) and the Berezka camo, which where already used during the Afghanistan War.
My inspiration for that camo combination were the uniforms from the Russian Army in World in Conflict. I used that combination for Type B. Talking about Type B, there is a huge variety of colors for the Butan Camo. Therefore I will show you two ways of painting them.
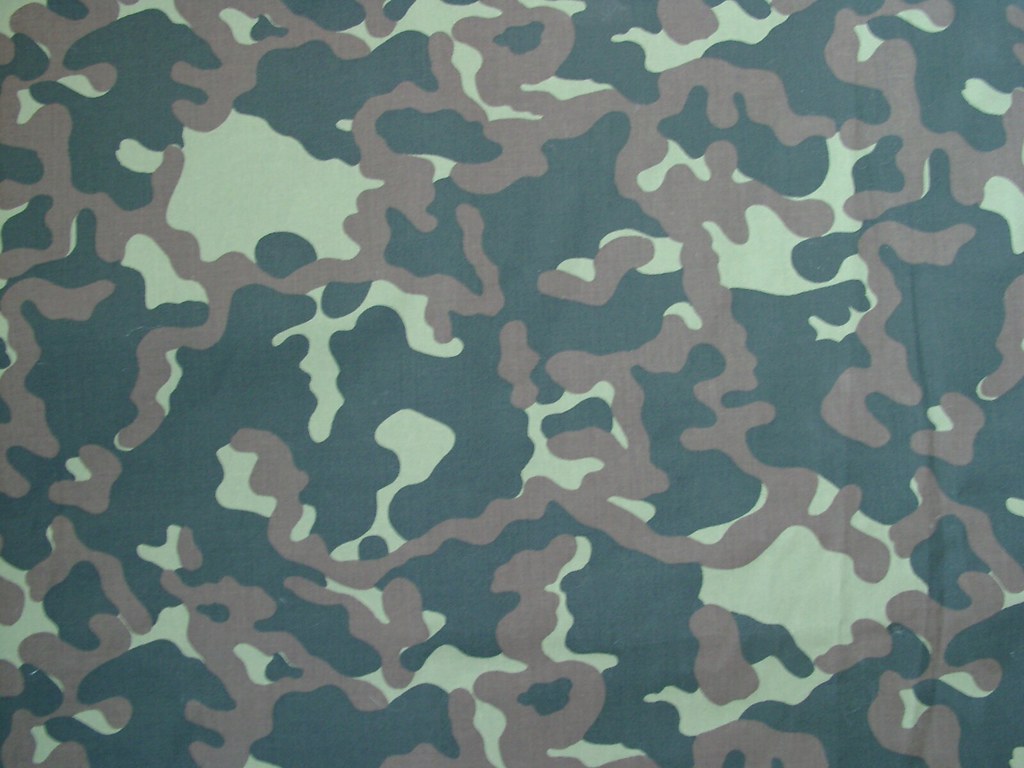
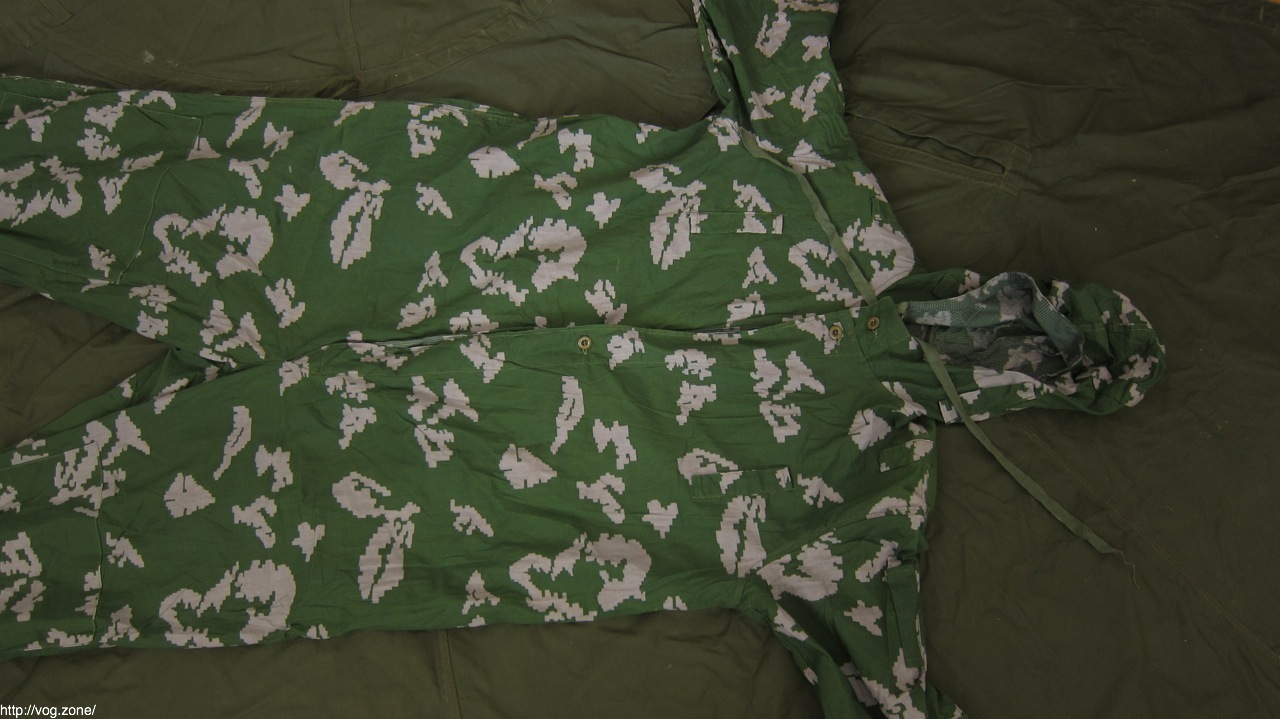
Hier haben wir ein Beispiel für die Butan Tarnung. Die dunkelgrünen Flecken erinnern an Blätterwerk während die Braunen Ästen ähneln.
Here we have an example of the Butan camo. The dark green pattern looks like leaves and the brown ones like branches.
Source: http://russianguns.ru
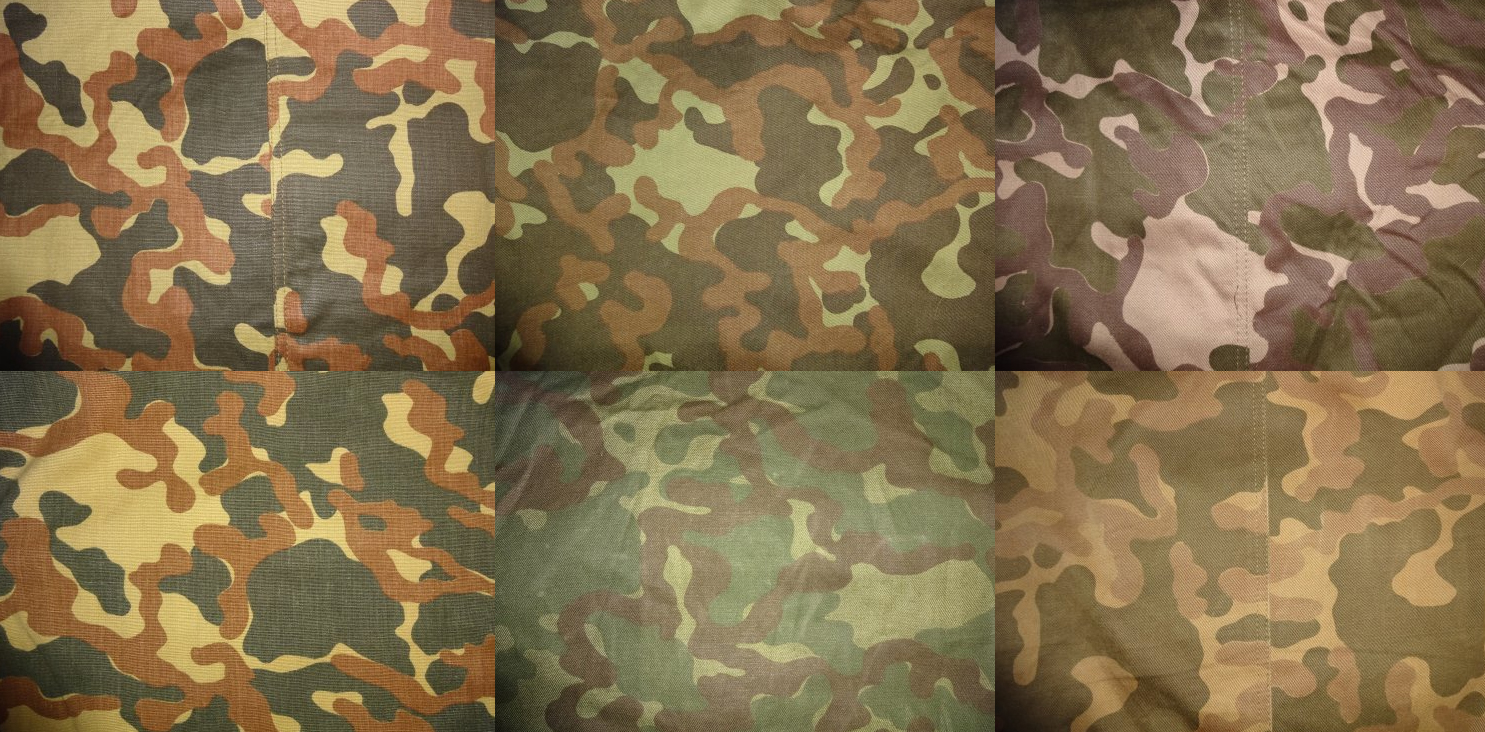
Wie ich schon sagte gibt eine große Bandbreite an Farbvarianten dieser Tarnung.
As I said there is a huge variety of colors for that camo.
Source: http://iacmc.forumotion.com/t7612-ttsko-colorations
Vorbereiten der Miniaturen
Preparing your miniatures
Während der Erstellung des Tutorials sind ein paar Dinge aufgefallen, welche man an den Figuren ändern kann um sie mehr anzupassen. Zum Beispiel der Aufnäher am Arm ist ziemlich überflüssig. Auch die Schulterstücke werden nicht benötigt, wenn man Typ B mit der Weste malt. Die Stiefel sind ziemlich baggy und wirken fast so als würden sie zur Hose gehören. Daher ist es möglich diese auch so zu bemalen, damit die VDV-Truppen nicht in den typischen Stiefeln rumlaufen. Um sicher zu gehen, dass es auch so aussieht kann man einfach den Bereich zwischen Hose und Stiefel etwas abschleifen.
While I was painting the miniatures for that tutorials I recognized a few things, you can change on your miniatures. For example the arm patch is useless. Same counts for the shoulder patches, if you paint Type B with the tactical vest. The boots are quite baggy so you can paint them as pants. To get sure it looks like the pants you can sand (may be I should say smooth out) the area between Pants and boots.
Type A
Step A 00
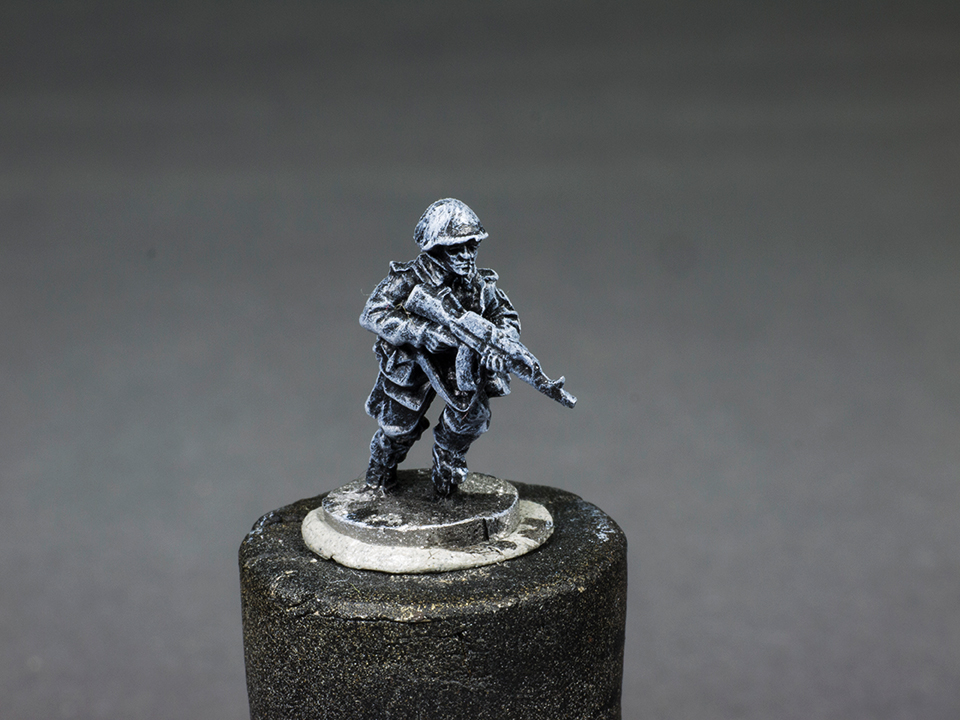
Als erstes wurde die Figur Schwarz grundiert. Um die Details besser sichtbar zu machen habe ich die Figur noch weiß trockengebürstet, allerdings ist das nicht unbedingt notwendig.
As usual I primed the miniature black and after that I drybrushed it white to see the details better but it is not really necessary to drybrush them.
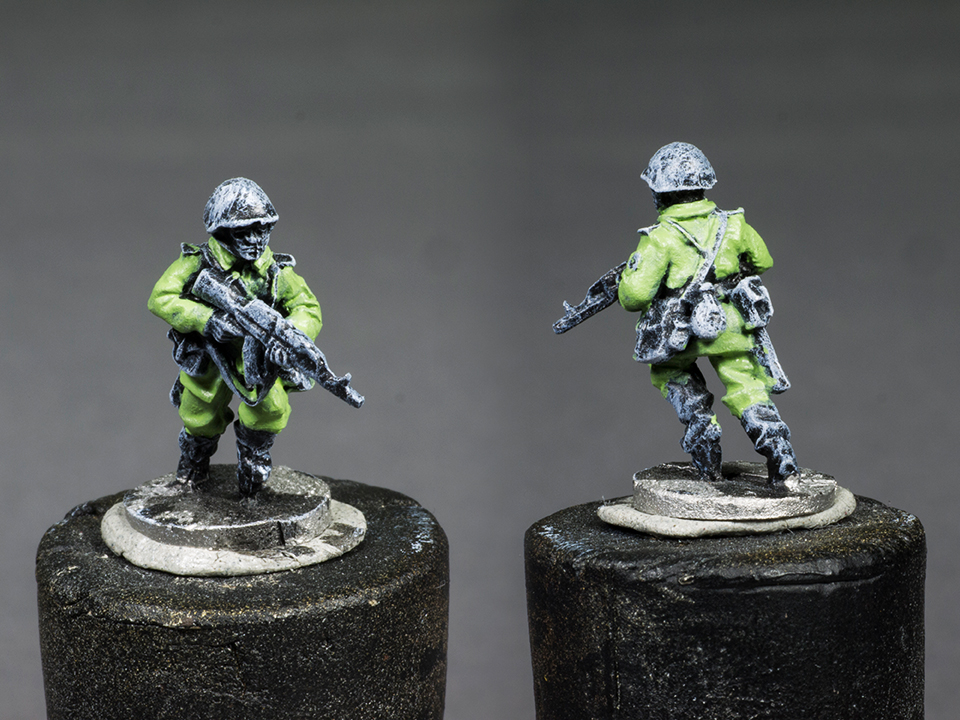
Step A 01
Die Grundfarbe war eine 50/50 Mischung aus VMC Olive Green und VMC Pastel Green.
The basecolor for type A is a 50/50 mixture of VMC Olive Green and VMC Pastel Green.
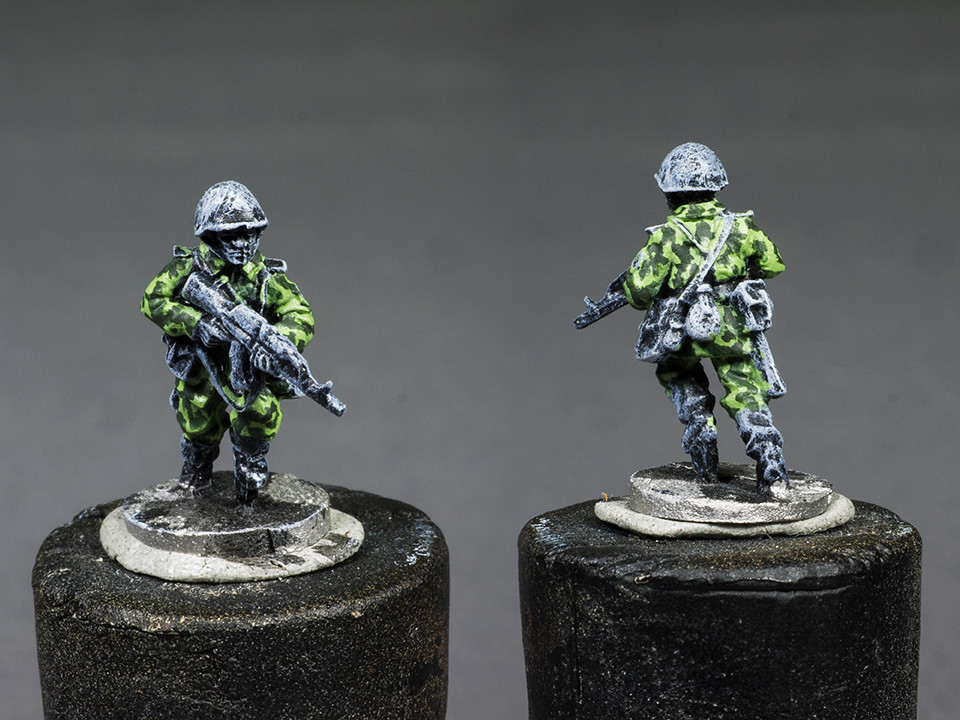
Step A 02
Als nächstes werden die dunkelgrünen Bereiche gemalt. Hierfür verwendete ich VMC German Camo Dark Green. Um den typischen Effekt dieses Musters zu erzielen tüpfelte ich die Flecken.
The second color for the dark green areas (or leaves as I call them) is VMC German Camo Dark Green. I stippled the areas to get the typical shapes of that camo.
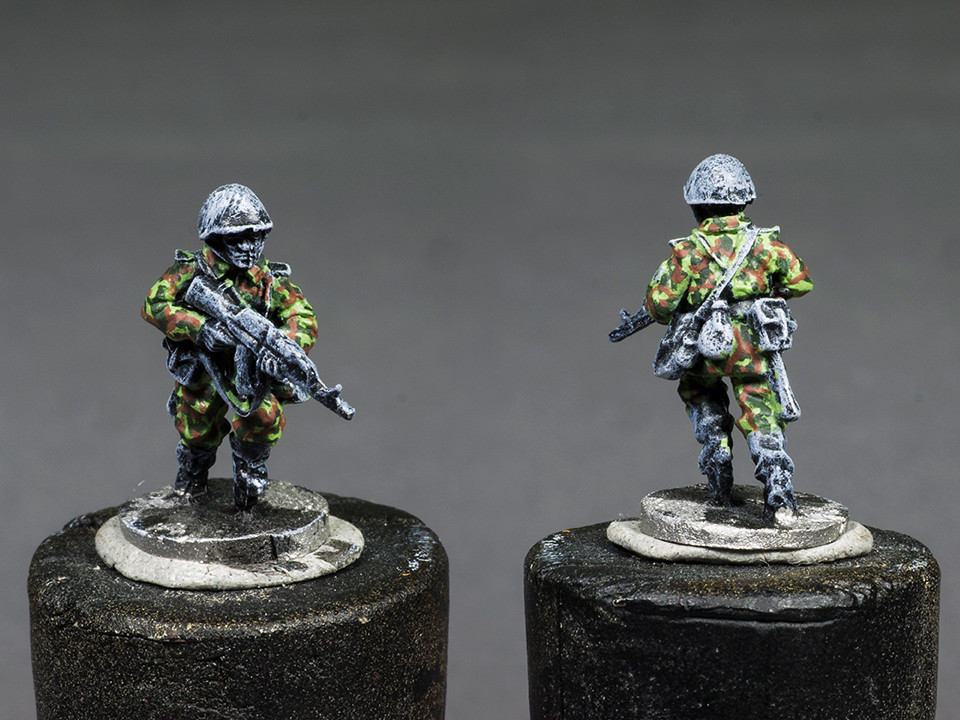
Step A 03
Für die braunen Flecken benutzte ich VMC Saddle Brown. Neben den dünnen braunen Linien die sich über das Muster ziehen kann man auch hier und da einzelne Punkte malen.
For the brown lines (the branches) I took VMC Saddle Brown. You also can make a few brown dots here and there.
Step A 04
Das Gesicht und der Helm wurden wie üblich bemalt. Ich ließ die Hände frei um später Handschuhe zu simulieren.
Paint the face and helmet as usual. I didn’t paint the hands so they can appear as black gloves.
Step A 05
Hände, die Waffe, Taschen und Gurte wurden Schwarz grundiert.
I gave the weapon, webbing, the hands/gloves and the boots a black base coat.
Step A 06
Auch die Taschen und Gurte wurden wie üblich mit VMC Brown Violet bemalt und mit einer Brown Violet und Beige Mischung akzentuiert.
The webbing was also painted as usual. VMC Brown Violet as base color and a mixture of Brown Violet and Beige as highlight.
Step A 07
Die AK und die Handschuhe wurden mit einem dunklen Grau (Mischung aus Schwarz und ein wenig Beige) akzentuiert. Zwar ist es historisch nicht ganz korrekt, da es wohl zu dieser Zeit noch keine komplett schwarzen AKs gab, aber es verstärkt doch den Eindruck einer Spezialeinheit.
I know it is historical not accurate but I decided to paint the weapon in Black with Dark Grey highlights so it looks more like special forces to me. The hand/gloves also got a Grey highlight.

Step A 08
Nicht zu vergessen ist der Schaufelstiel (Light Brown and German Camo Medium Brown mixture 1:1).
Don’t forget to paint the shovel (Light Brown and German Camo Medium Brown mixture 1:1).
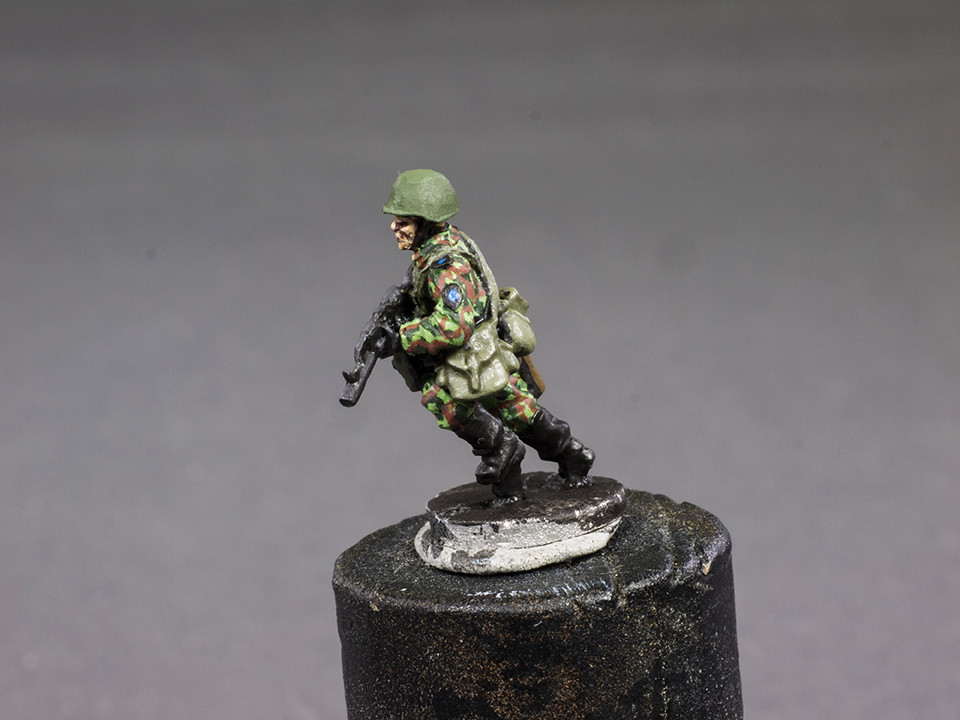
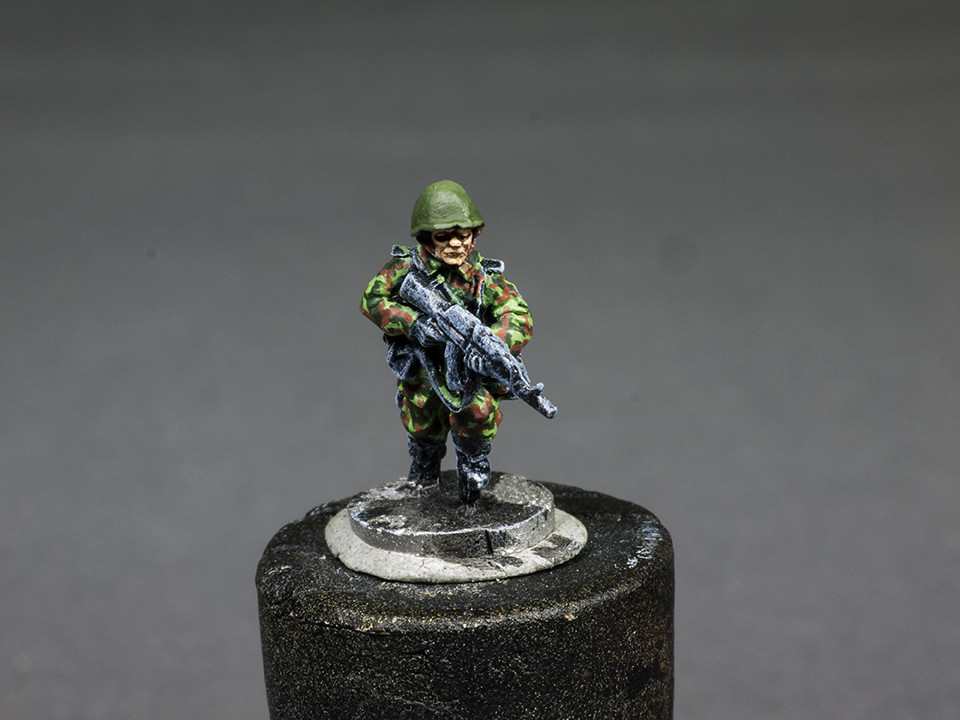
Step A 09
Die Schulterstücke und der Armpatch wurden mit einer 50/50 Mischung aus VMC Sky Blue und VMC Dark Blue (die einzigen Blautöne die ich habe). Eine dünne Linie auf der Schulter und ein Punkt auf den Armpatch sollten ausreichen. Natürlich ist das nur nötig, wenn man diese Teile nicht entfernt hat. Die Schulterstücke können auch in Tarnung bemalt werden.
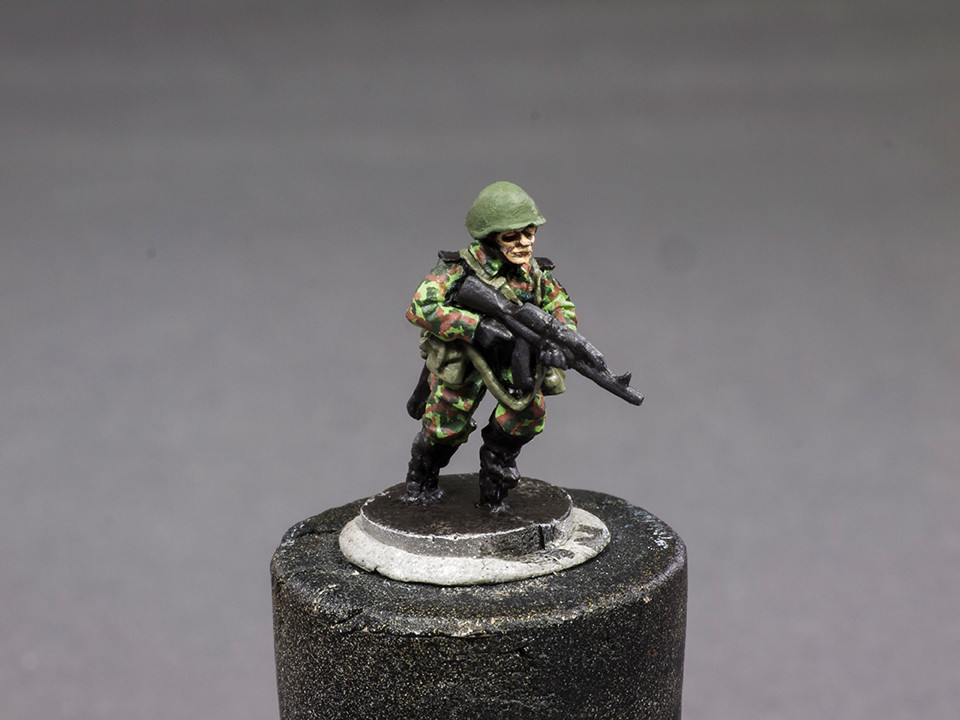
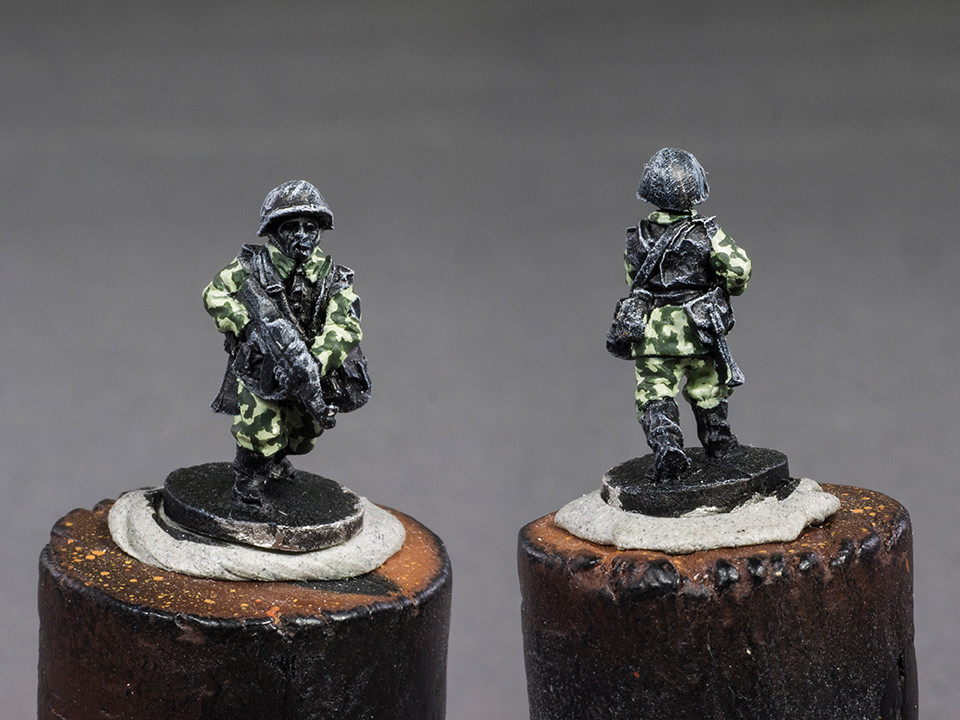
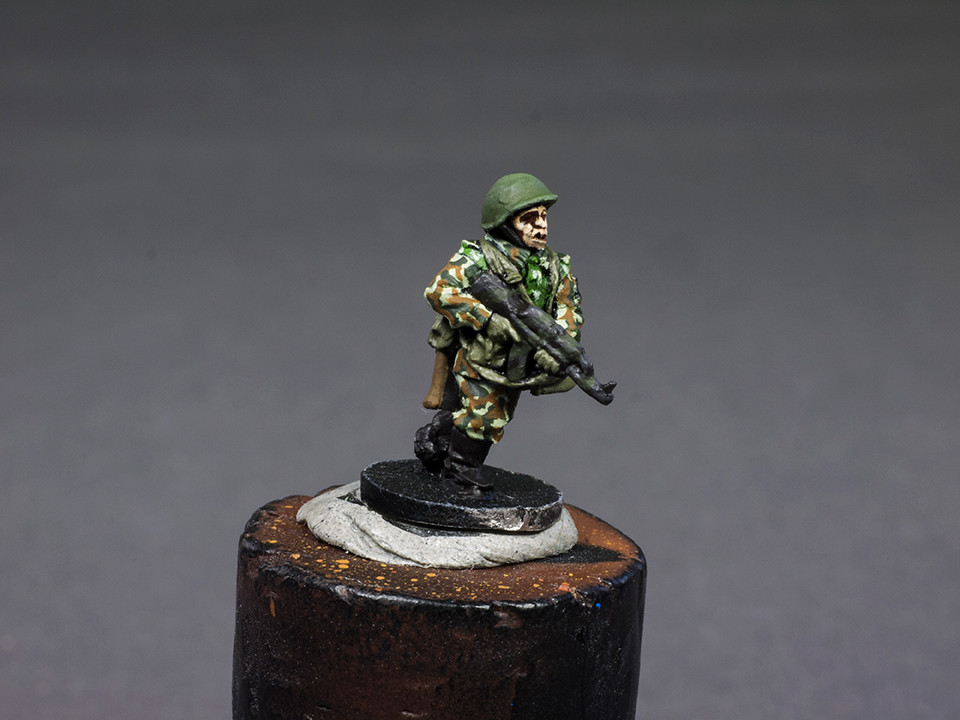
Damit haben wir unsere erste VDV Miniatur. Es folgt Typ B
I painted the arm and shoulder patch Blue (50/50 mix of VMC Sky Blue and VMC Dark Blue). You can erase that patch with a file because a blue patch on your camo suit doesn’t look helpful to me.
Here we are with our first finished VDV miniature. Let’s proceed with Type B
Vorher möchte ich euch aber noch ein Beispiel für die Berezka Tarnung zeigen, welche ich in Typ B verwenden werde.
First of all I want to show you an example of the Berezka Camo pattern, which I am going to use for type B.
Source: http://vog.zone/author/joonas-kokko/
Type B
Step B 00
Als erstes wurde die Figur Schwarz grundiert. Um die Details besser sichtbar zu machen habe ich die Figur noch weiß trockengebürstet, allerdings ist das nicht unbedingt notwendig.
As usual I primed the miniature black and after that I drybrushed it white to see the details better but it is not really necessary to drybrush them.

Step B 01
Die Grundfarbe für Typ B war VMC Pastel Green. Brust und Rücken wurden dabei ausgelassen um, wie bereits gesagt, die Weste zu malen.
The basecolor for type B is pure VMC Pastel Green. I didn’t paint the chest and back area to paint a tactical vest for Type B. You also can erase shoulder patches for that effect.
Step B 02
Als nächstes werden die dunkelgrünen Bereiche gemalt. Hierfür verwendete ich VMC German Camo Dark Green. Um den typischen Effekt dieses Musters zu erzielen tüpfelte ich die Flecken. Man kann auch das Grün abändern wenn man möchte, jenachdem welche Grundfarbe man ausgewählt hat, allerdings bin ich bei German Camo Dark Green geblieben, da es auch hier ganz gut passt.
The second color is CMV German Camo Dark Green. I stippled the areas to get the typical Shapes of that camo. You can change the green tone if you want to but it depends on the basecolor. But German Camo Dark Green fits also quite well to that.
Step B 03
Je nach Grundfarbe ändert sich auch das Braun, daher habe ich für Typ B VMC Flat Earth verwendet. Neben den dünnen braunen Linien die sich über das Muster ziehen kann man auch hier und da einzelne Punkte malen.
Depending on the base color the brown changes, so I used VMC Flat Earth this time.

Step B 04
Die Grundfarbe für die Berezka Tarnung ist VMC Olive Green. Alternativ kann man auch VMC USA Uniform, German Camo Bright Green oder eine Mischung aus VMC Camo Olive Green und Beige nehmen.
I painted the “vest” in the Berezka Camo pattern and the basecolor is VMC Olive Green. Another Option would be VMC USA Uniform, German Camo Bright Green or a mixture of VMC Camo Olive Green and Beige.
Step B 05
Den pixeligen Effekt der Berezka Tarnung bekommt man in diesem Maßstab leider nicht hin, aber die regulären Formen reichen schon aus. Diese erinnern etwas an Blätter. Sie wurden in VMC Pastel Green gemalt. Es gehen auch andere Beigetöne.
It is impossible to paint the pixeled effect of that pattern in 15mm scale so I painted just the typical shapes of that camo (which reminds me of leaves) in VMC Pastel Green. You can use any other beige, too.
Step B 06
Das Gesicht, der Helm, die Taschen und Gurte sowie die AK wurden wie in Typ A bzw. die Motor Rifle Company bemalt. Für die Handschuhe benutzte ich diesesmal die gleichen Farben wie für Taschen.
Face, helmet, wepaon and webbing were painted the same way as type A and the Motor Rifle Company. Again I painted the gloves, but this time I used the same color as for the webbing.
Step B 07
Ebenfalls nicht korrekt aber auch ziemlich sehenswert sind die Tarnstreifen welche ich auf die Waffe malte. Hierfür verdünnte ich VMC Camo Olive Green stark und lasierte dünne Streifen auf die AK.
I had the idea to give the rifle a camouflaged look even so this isn’t really historical accurate. Anyways I glazed thin Camo Olive Green stripes on the AK.
Step B 08
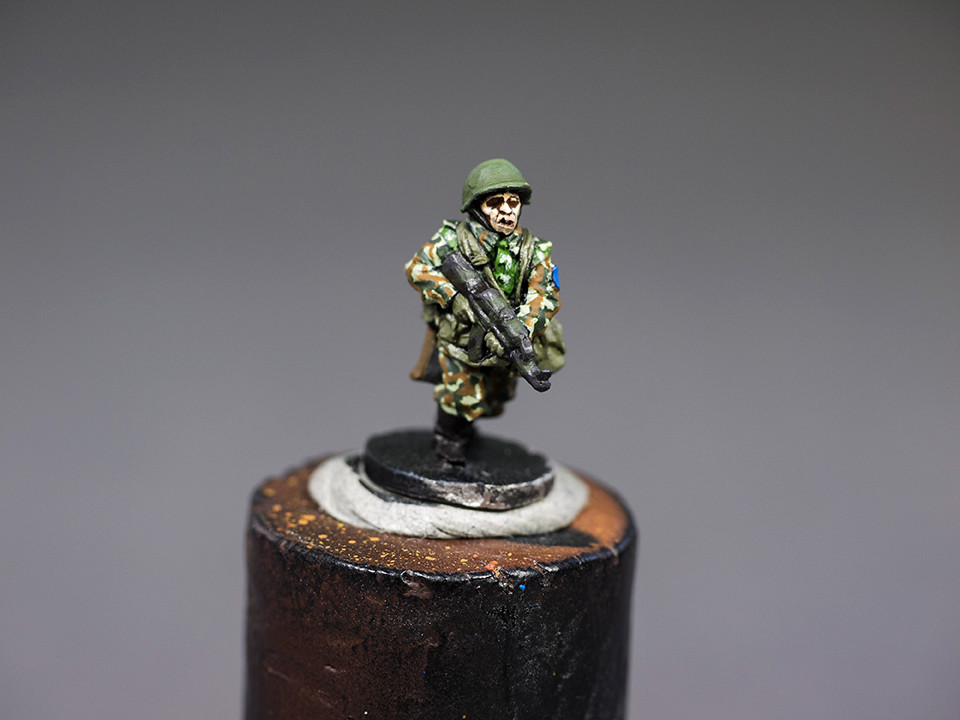
Der Armpatch wurde blau bemalt, sofern du diesen nicht entfernt hast.
Paint the patch blue again of you haven’t removed it and you are done.
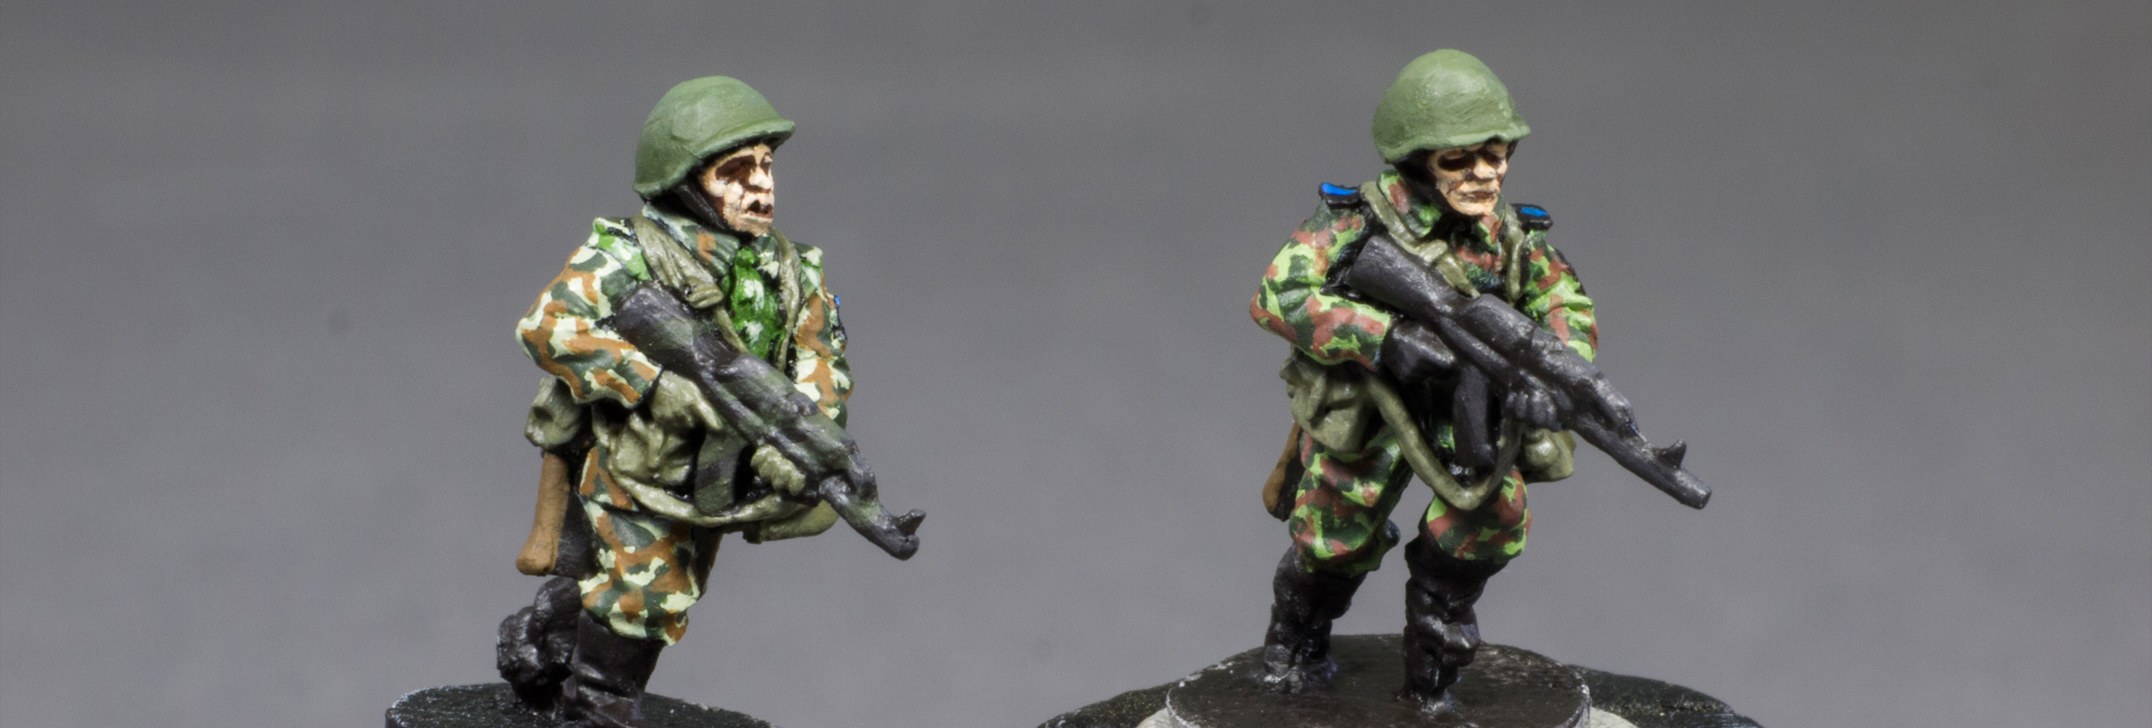
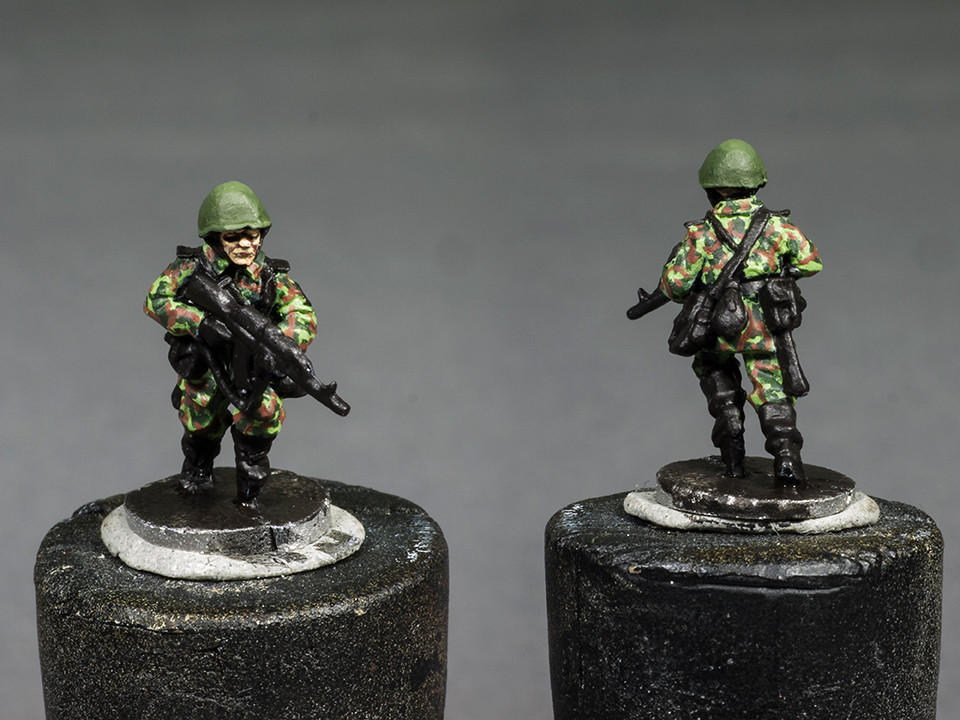
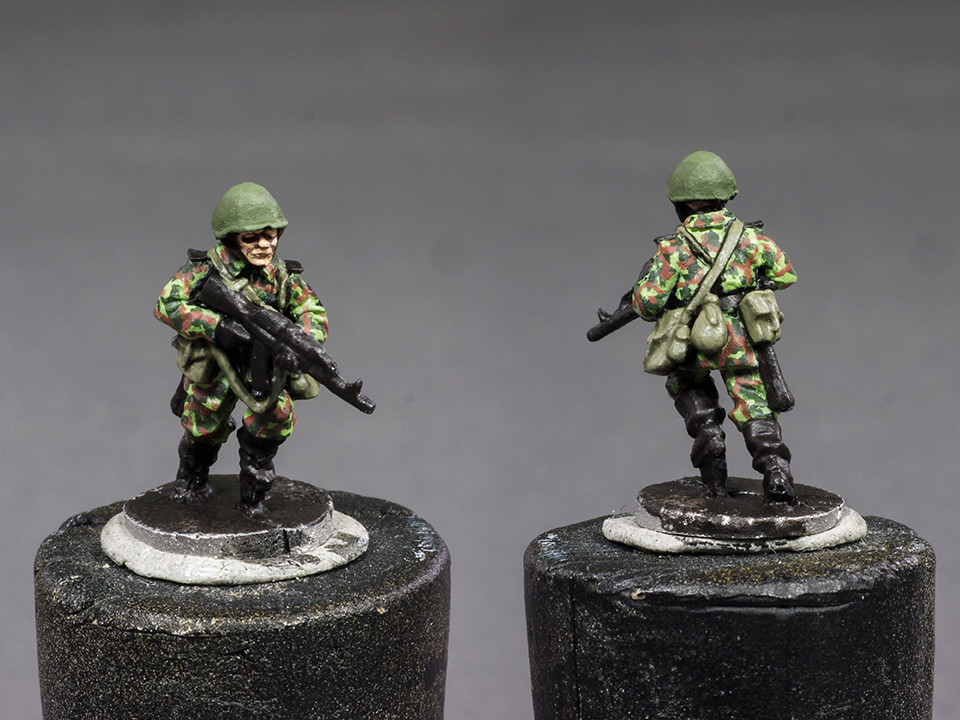
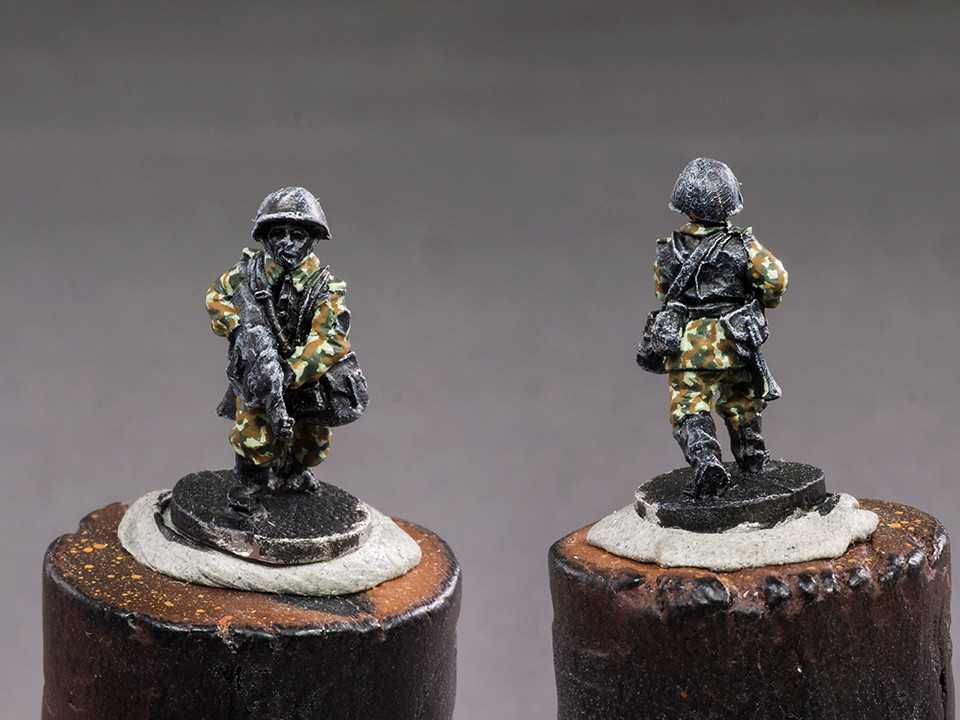
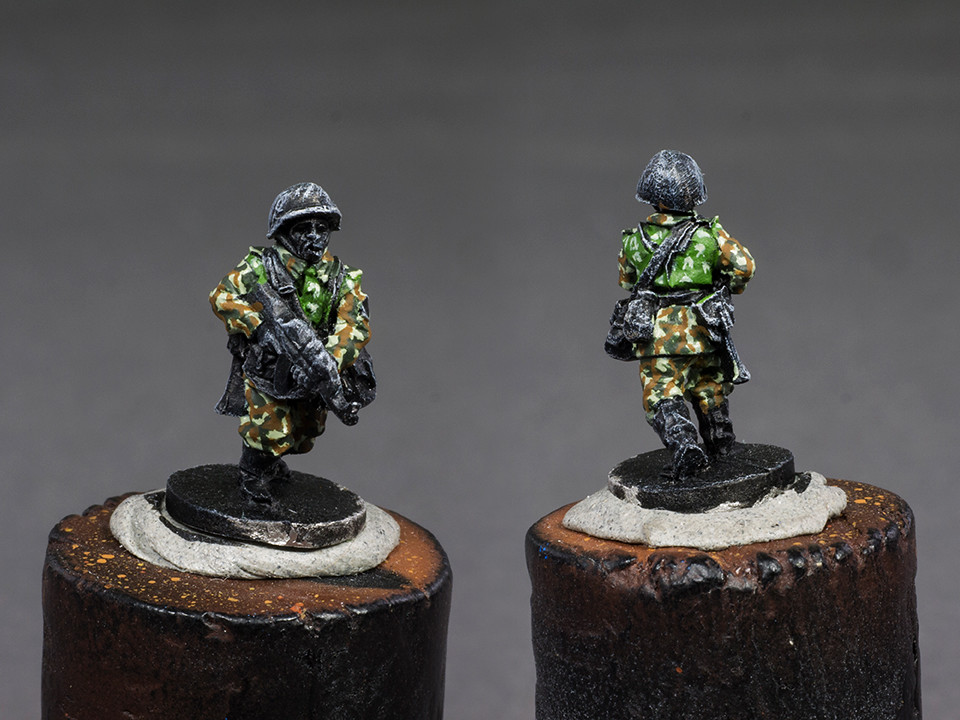
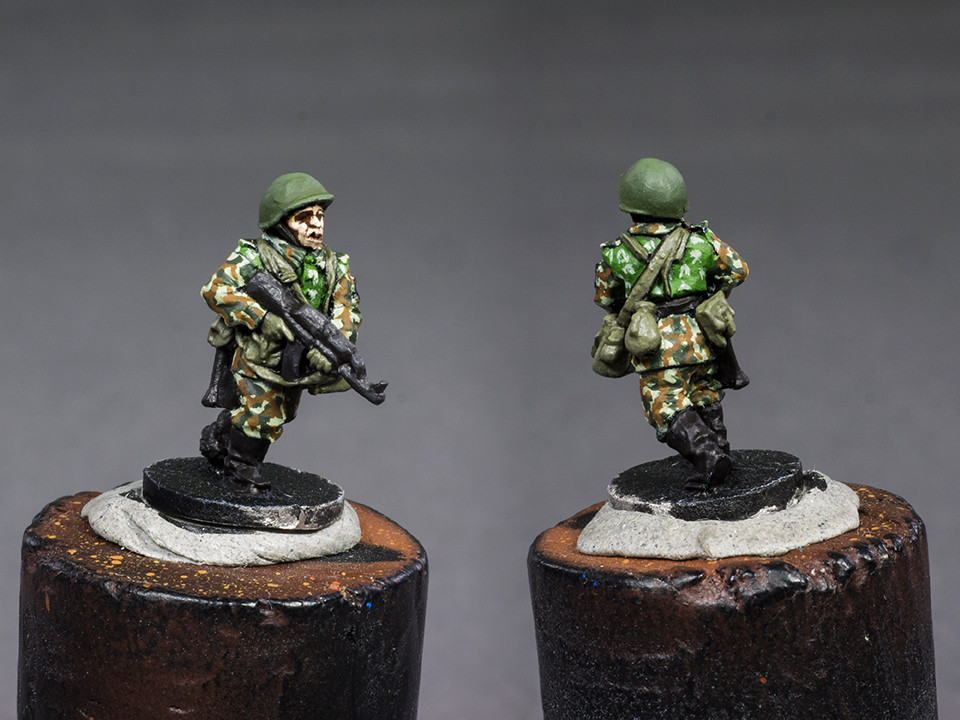
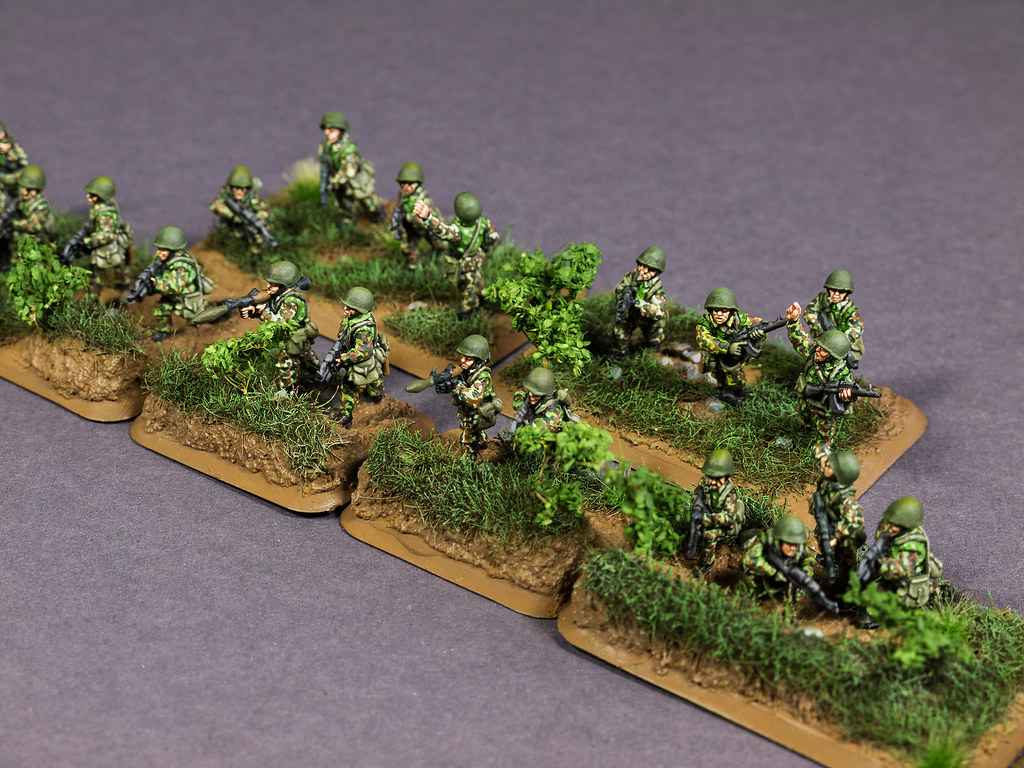
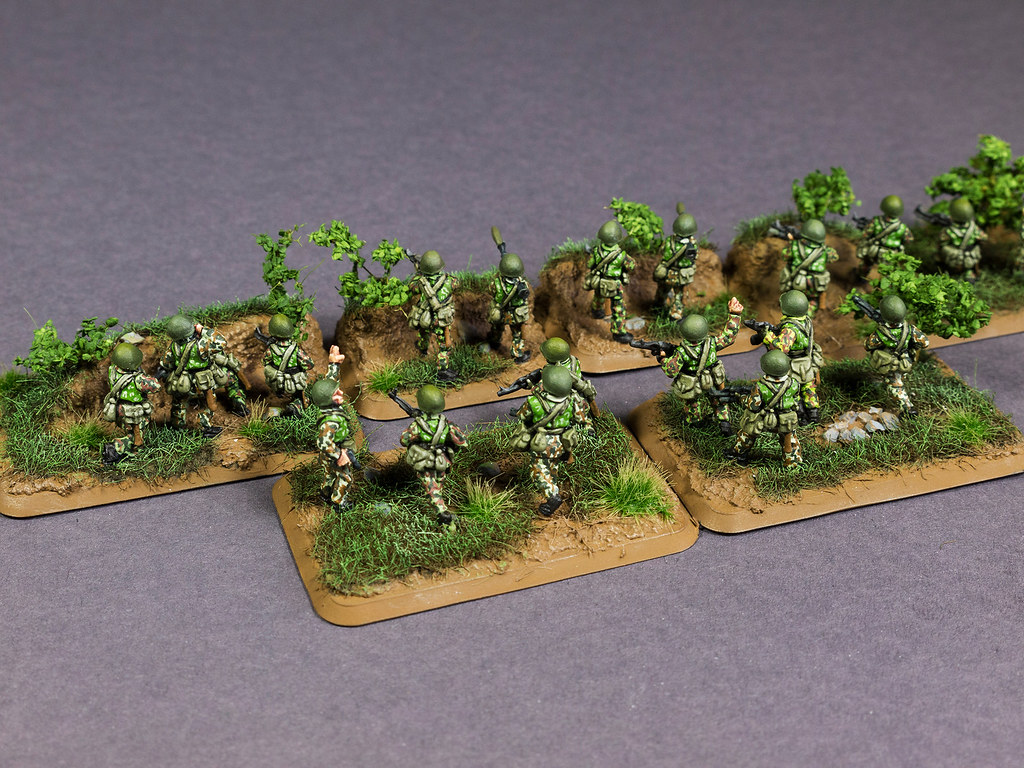
Hier haben wir unsere fertigen Figuren und vergiss nicht einen Schutzlack (Seidenmatt oder matt) aufzutragen um deine Arbeit zu schützen.
Here we have the finished miniatures. Don’t forget to apply some varnish to save your paint job.
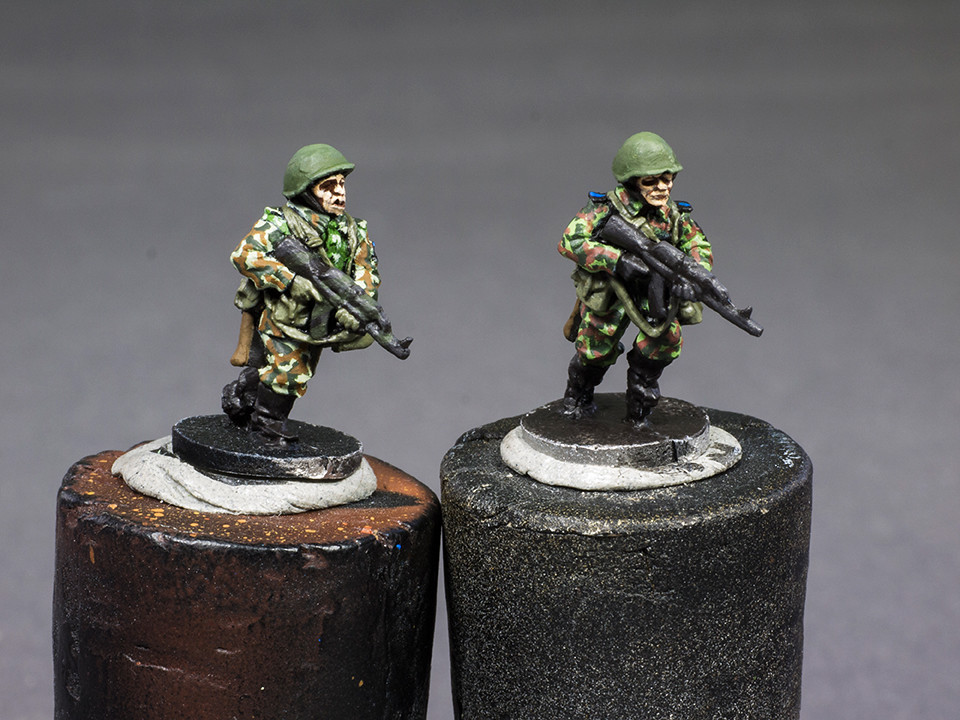
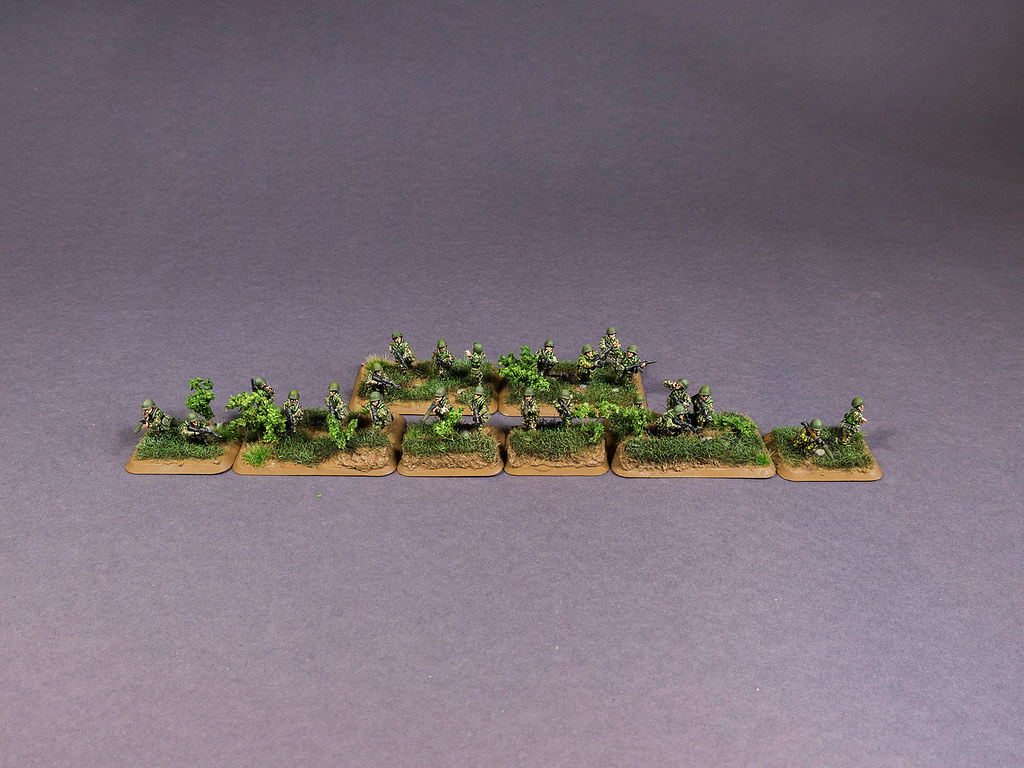
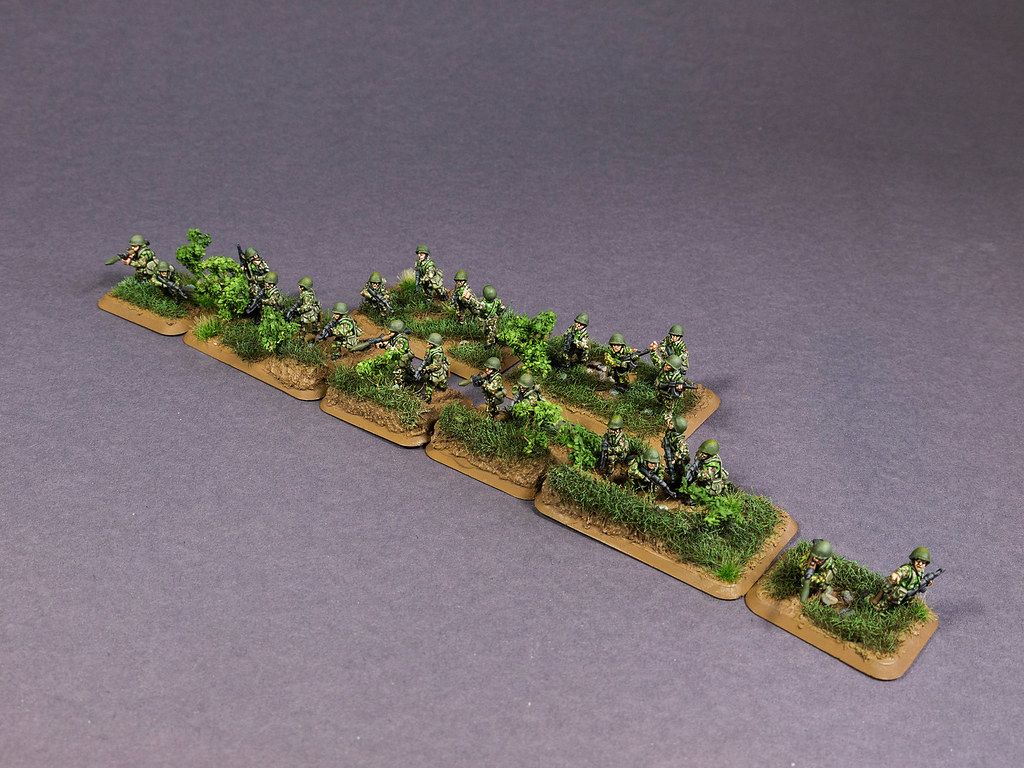
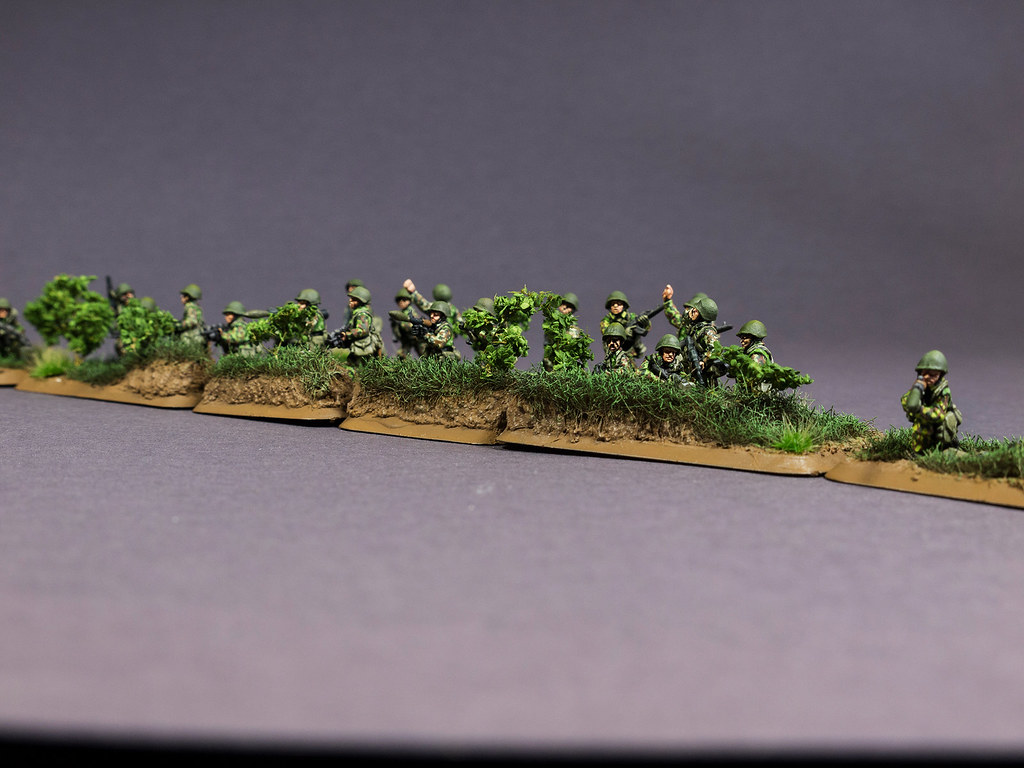
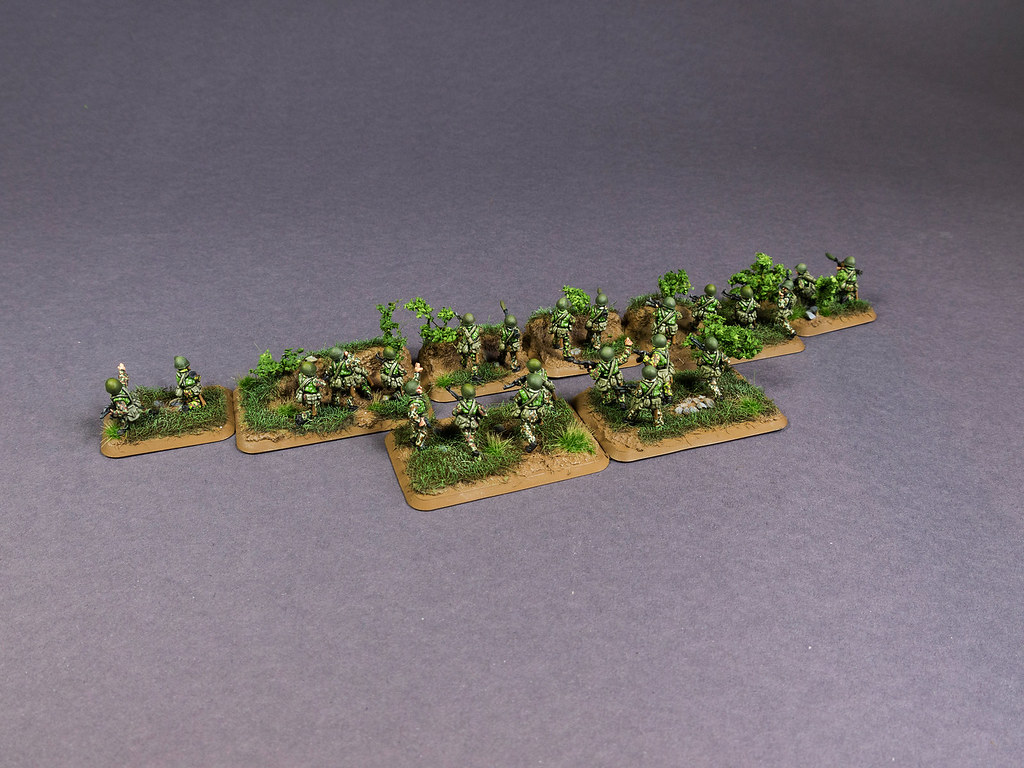
Damit ihr einen Gesamteindruck bekommen könnte habe ich hier noch mein ganzes Platoon abgelichtet.
So that you guys can get an overall impression I made some pictures of the whole platoon.
Ich hoffe euch gefiel auch unser drittes Tutorial für Team Yankee. Jegliche Kritik oder Kommentare sind mir natürlich willkommen und falls ihr das Ganze als Video sehen wollt hinterlasst mir ein Kommentar
I hope you liked my third tutorial for Team Yankee. Any critics and comments are welcome and if you want to see this tutorial as video please leave a comment below.
Geniale Ausführung, tolles Tutorial. Werde künftig versuchen, meine VDV entsprechend zu bemalen! Vielen Dank!